Abaqus Tutorial: CAE Workflow for Beginners Step by Step


Deepak S Choudhary
Use one repeatable Abaqus/CAE path from geometry through results, with checkpoints that catch clean-looking errors before sign-off. This walkthrough follows each module in order and adds a seismic boundary cheat sheet, plus one quick mesh quality metric to record.
Most first-time models fail for simple reasons. Loads land in the wrong region. Constraints override the part. Outputs are missing, so you only see colors, not evidence. Units drift, and the run still looks smooth.
So we keep this strict and practical. You will build one small model end-to-end, then you will apply review checks that survive design discussions. This is the difference between a plot and a defendable result.
Start with the Learning Edition when you are new and want muscle memory without setup noise. It is training-first and caps structural models at 1000 nodes, which keeps runtimes short while you practice the complete setup to the post chain.
Workflow Map
Abaqus/CAE is structured as a module sequence, and the starter material mirrors that layout for traceability. Follow the chain, and missteps show up sooner, especially in loads, interactions, and output requests.
Here is the one decision aid visual for this page. Use it as a checklist, and do not move on until the check is true.
Part → Property → Assembly → Step → Interaction → Load → Mesh → Job → Visualization (docs.software.vt.edu)
Now apply it like this. You define one thing, and you verify one thing.
Module | Define | Verify |
Part | Geometry and partitions | Faces exist for loads |
Property | Material and section | Magnitudes make sense |
Assembly | Instances and sets | Sets the point to the right regions |
Step | Procedure and outputs | History output is requested |
Interaction | Contact or ties | Pairs and normals are correct |
Load | Loads and constraints | Reaction balance is plausible |
Mesh | Element type and size | Refinement where gradients live |
Job and Results | Submit and interrogate | Warnings read and addressed |
This same checklist is also a clean way to explain your process in a review. It shows you are not guessing.
Install and Start
For training, use the student build first. It runs on Windows, ships with the full HTML help set, and caps structural jobs at 1000 nodes, which keeps solve time predictable per case.
Step 1 - Start Session
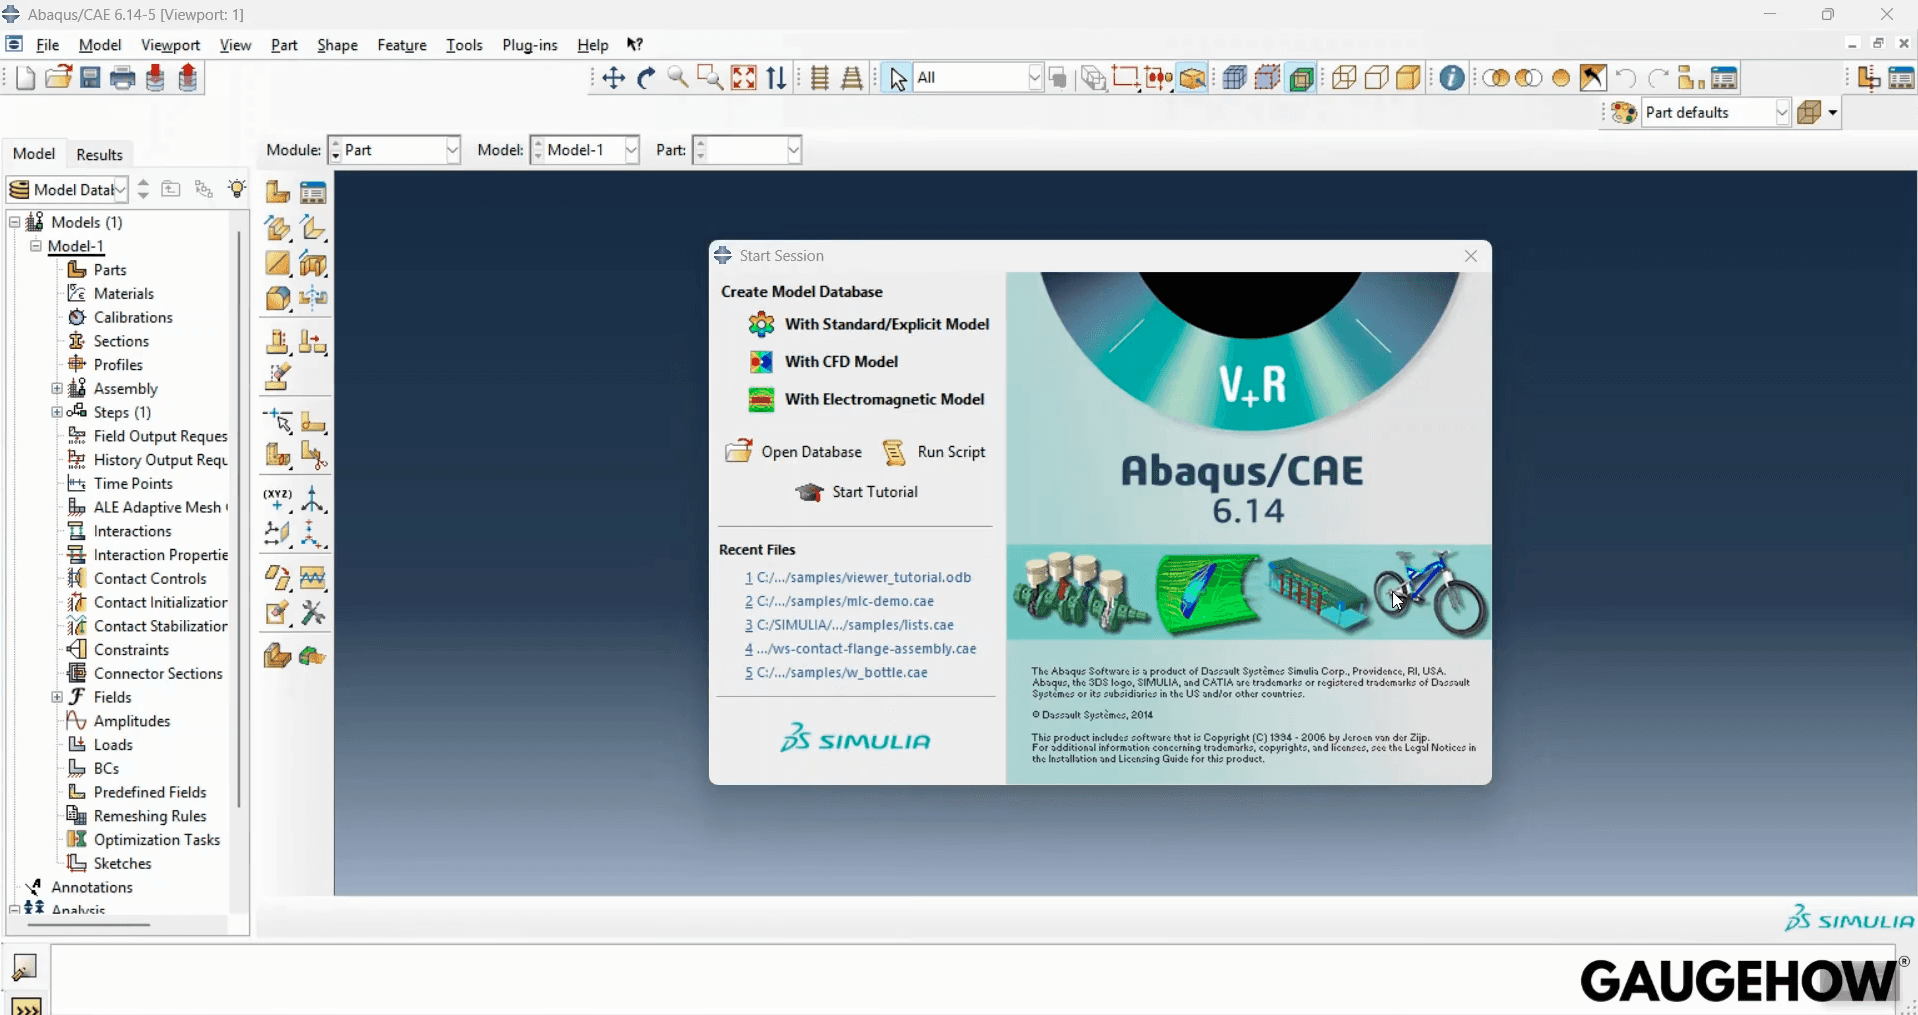
Download Abaqus only from the SIMULIA education portal, since that is where the current installer, license notes, and patch alerts are maintained for students.
On day one, you want a clean baseline. Set a dedicated working folder, run a shipped example once, and confirm where the job files are written.
Step 2 - Getting Started Examples → Lap Joint
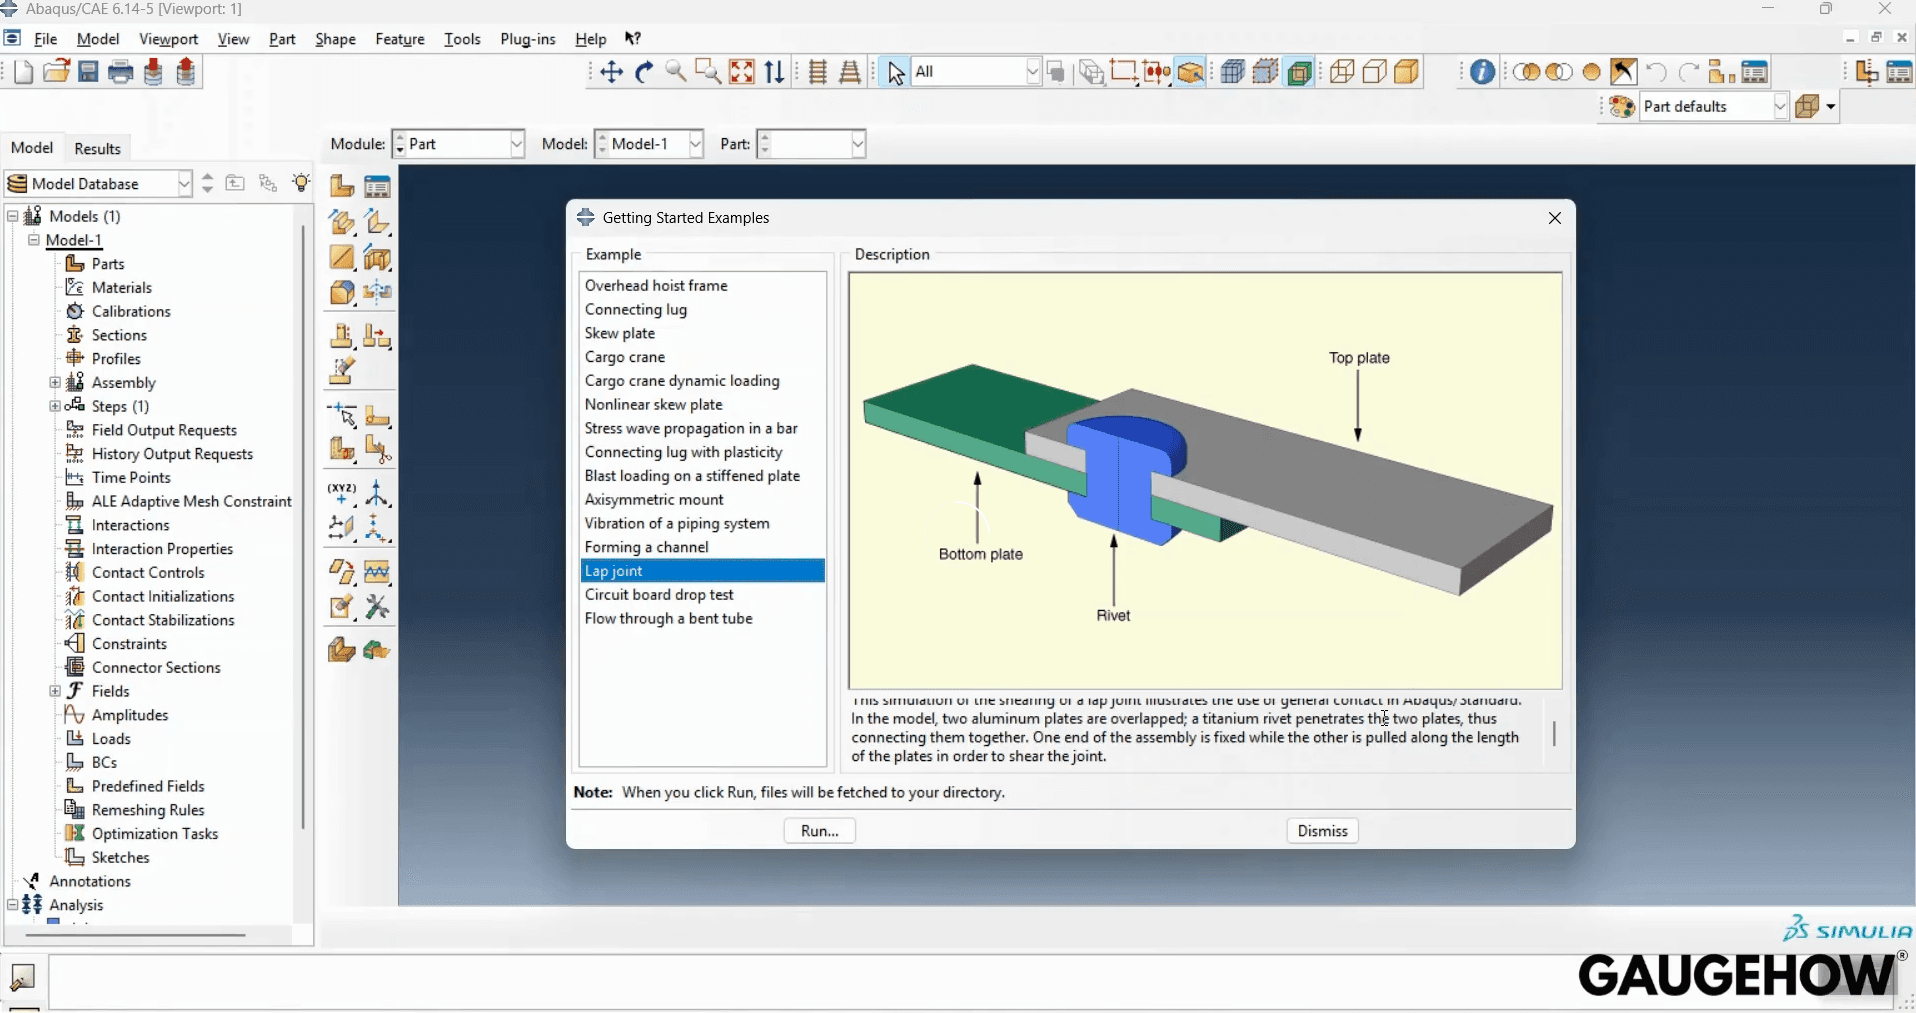
Most installation pain in Abaqus comes from permissions, paths, or missing write access.
Keep two documents close. Use the reference manual when syntax must be exact, and use the getting started guide when you need the module sequence, defaults, and a known good example to clone.
This ABAQUS tutorial assumes you want good habits first, not shortcuts.
Build the First Model.
Start with a geometry you can sanity check in your head. A plate bracket works because you can estimate stiffness and stress shape before solving, then compare within 10% after the first run. That is why most university labs begin there.
Decide your unit system before you type numbers. The solver does not enforce units, so you must. Pick one consistent set, and then sanity check one value by hand. If you want one anchor phrase to remember, it is abaqus units.
Now build in a stable order. Create the part, add partitions where loads and constraints will act, and then create sets and surfaces with clear names.
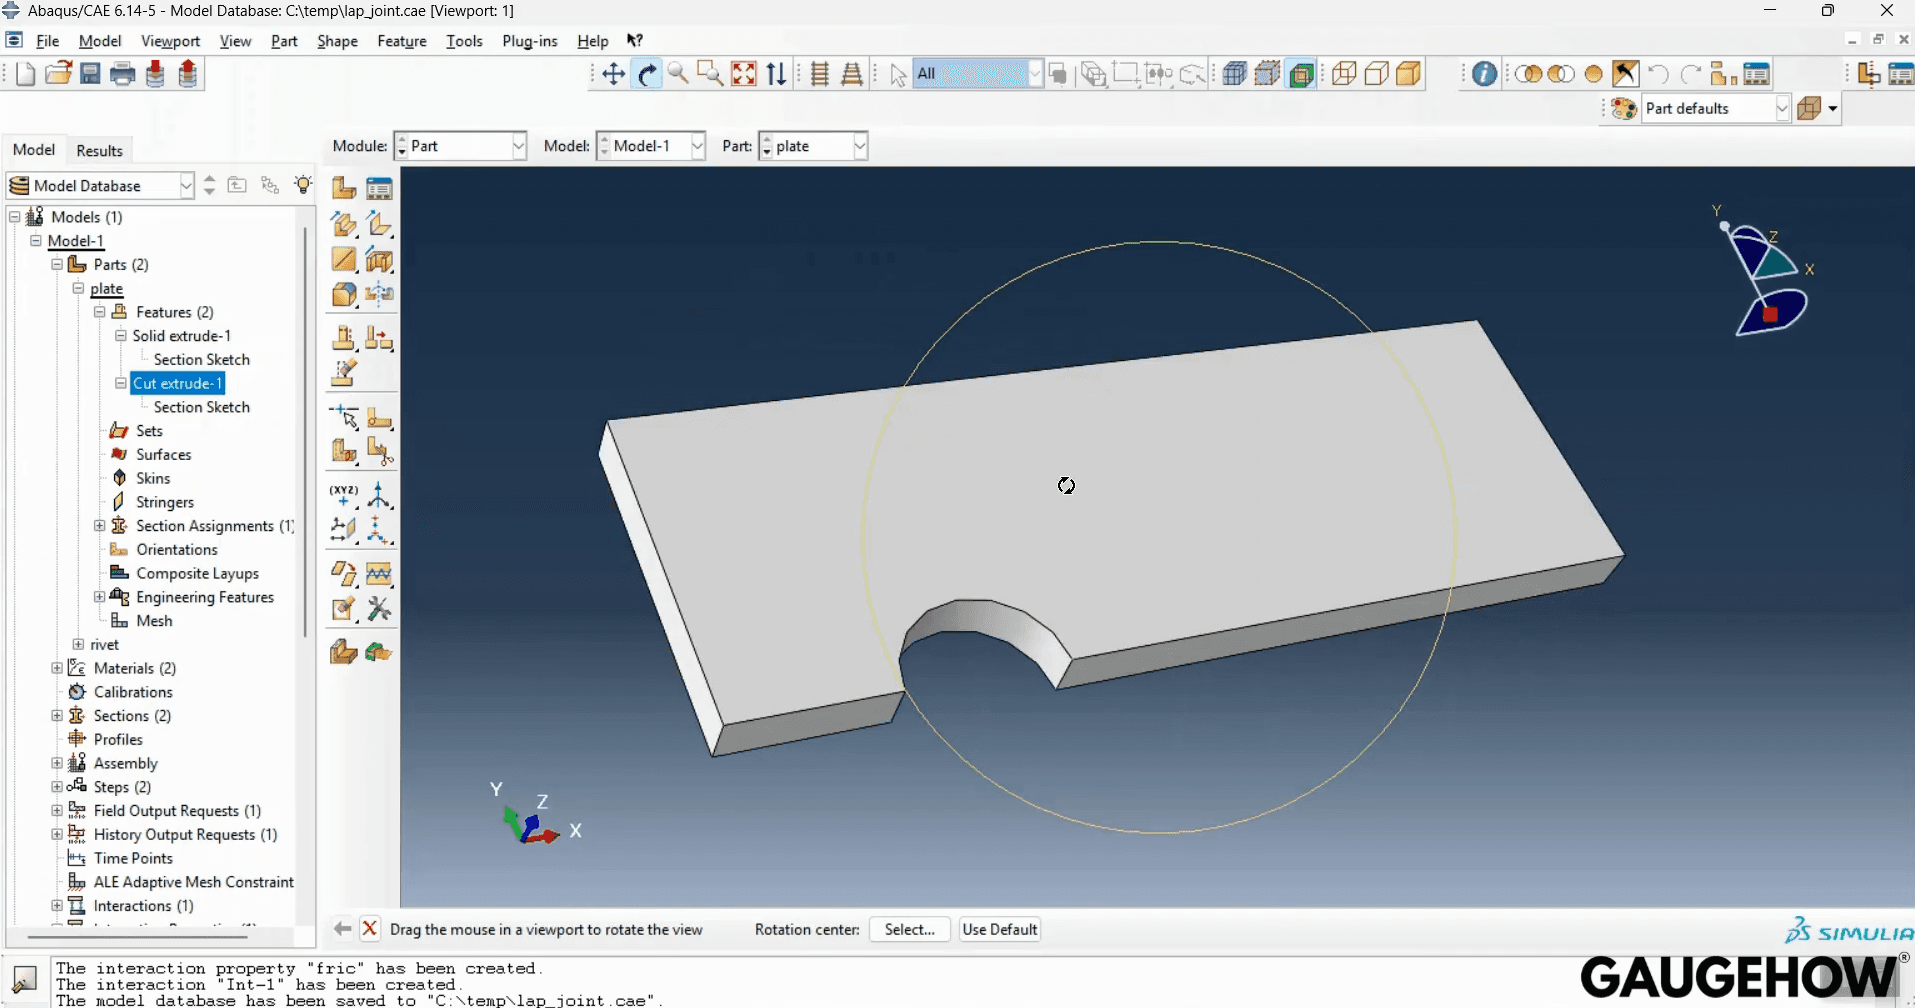
Step 3 - Part Module: First Sketch (Plate Base)
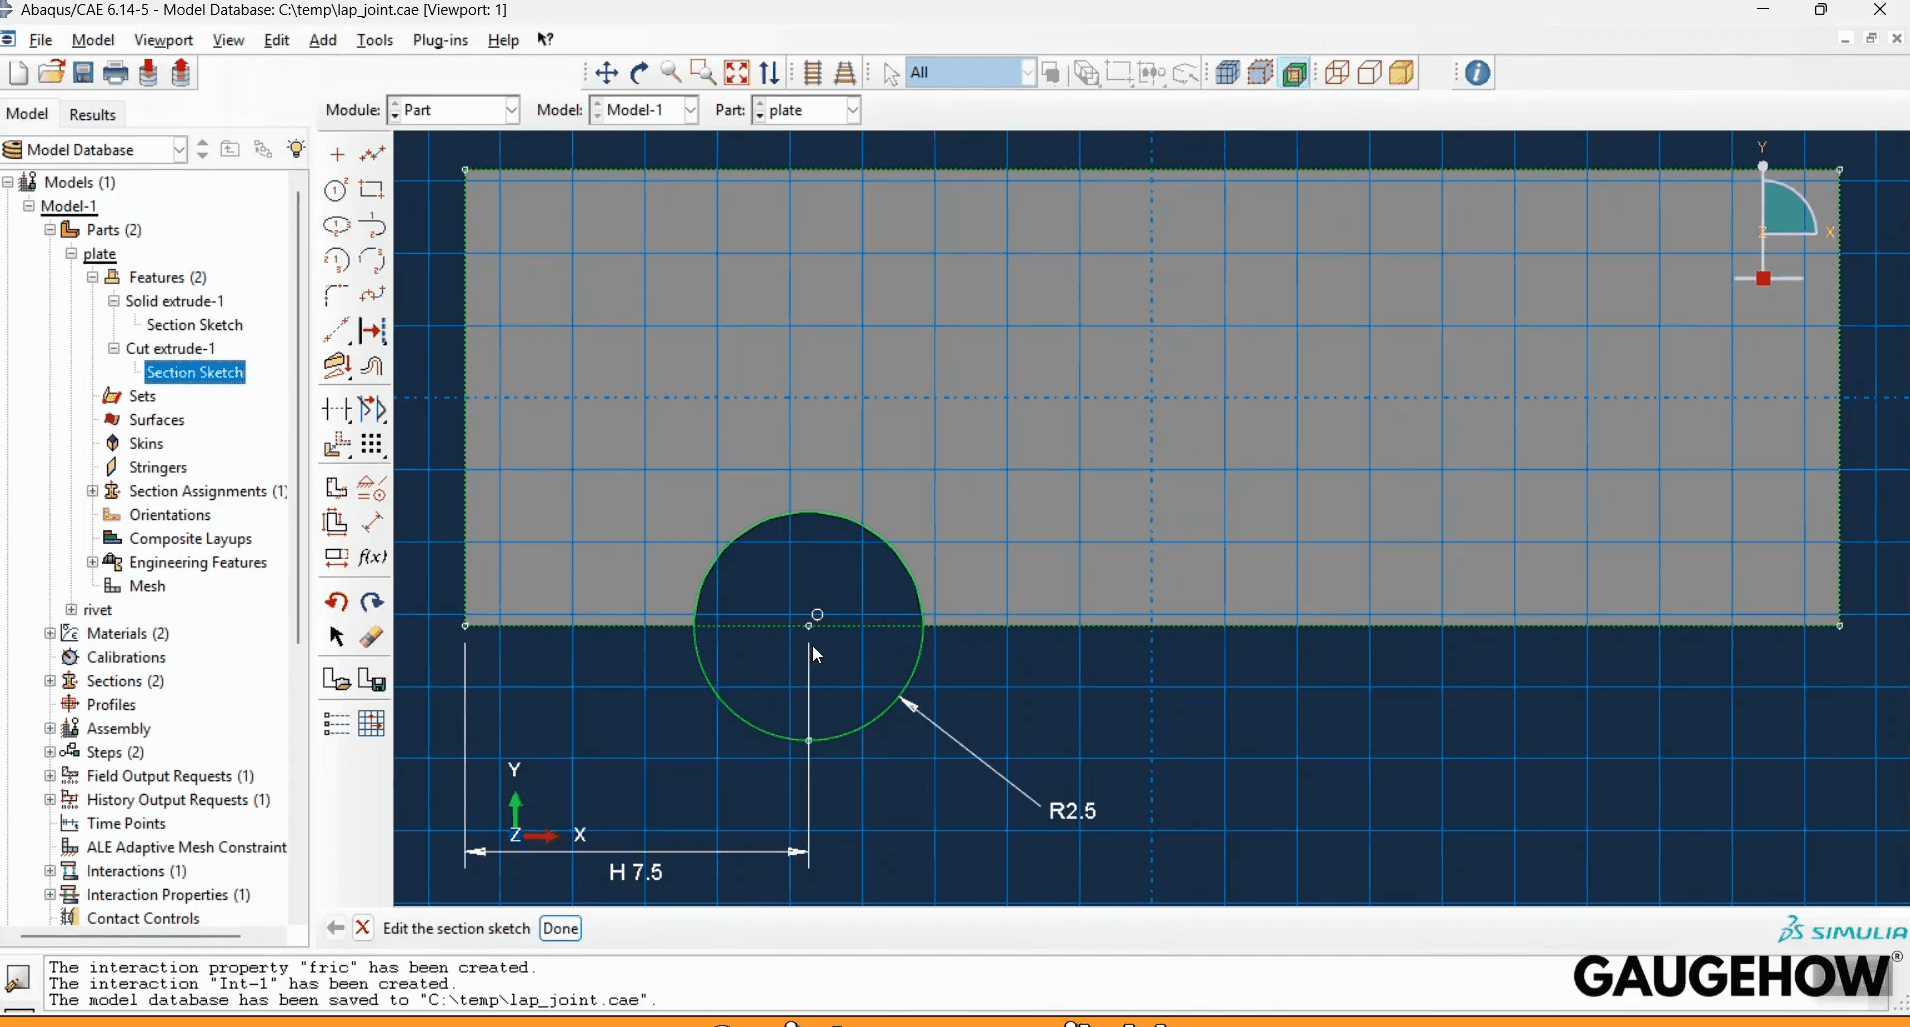
Step 4 - Part Module: Cut/Extrude Feature (Shape Detail)
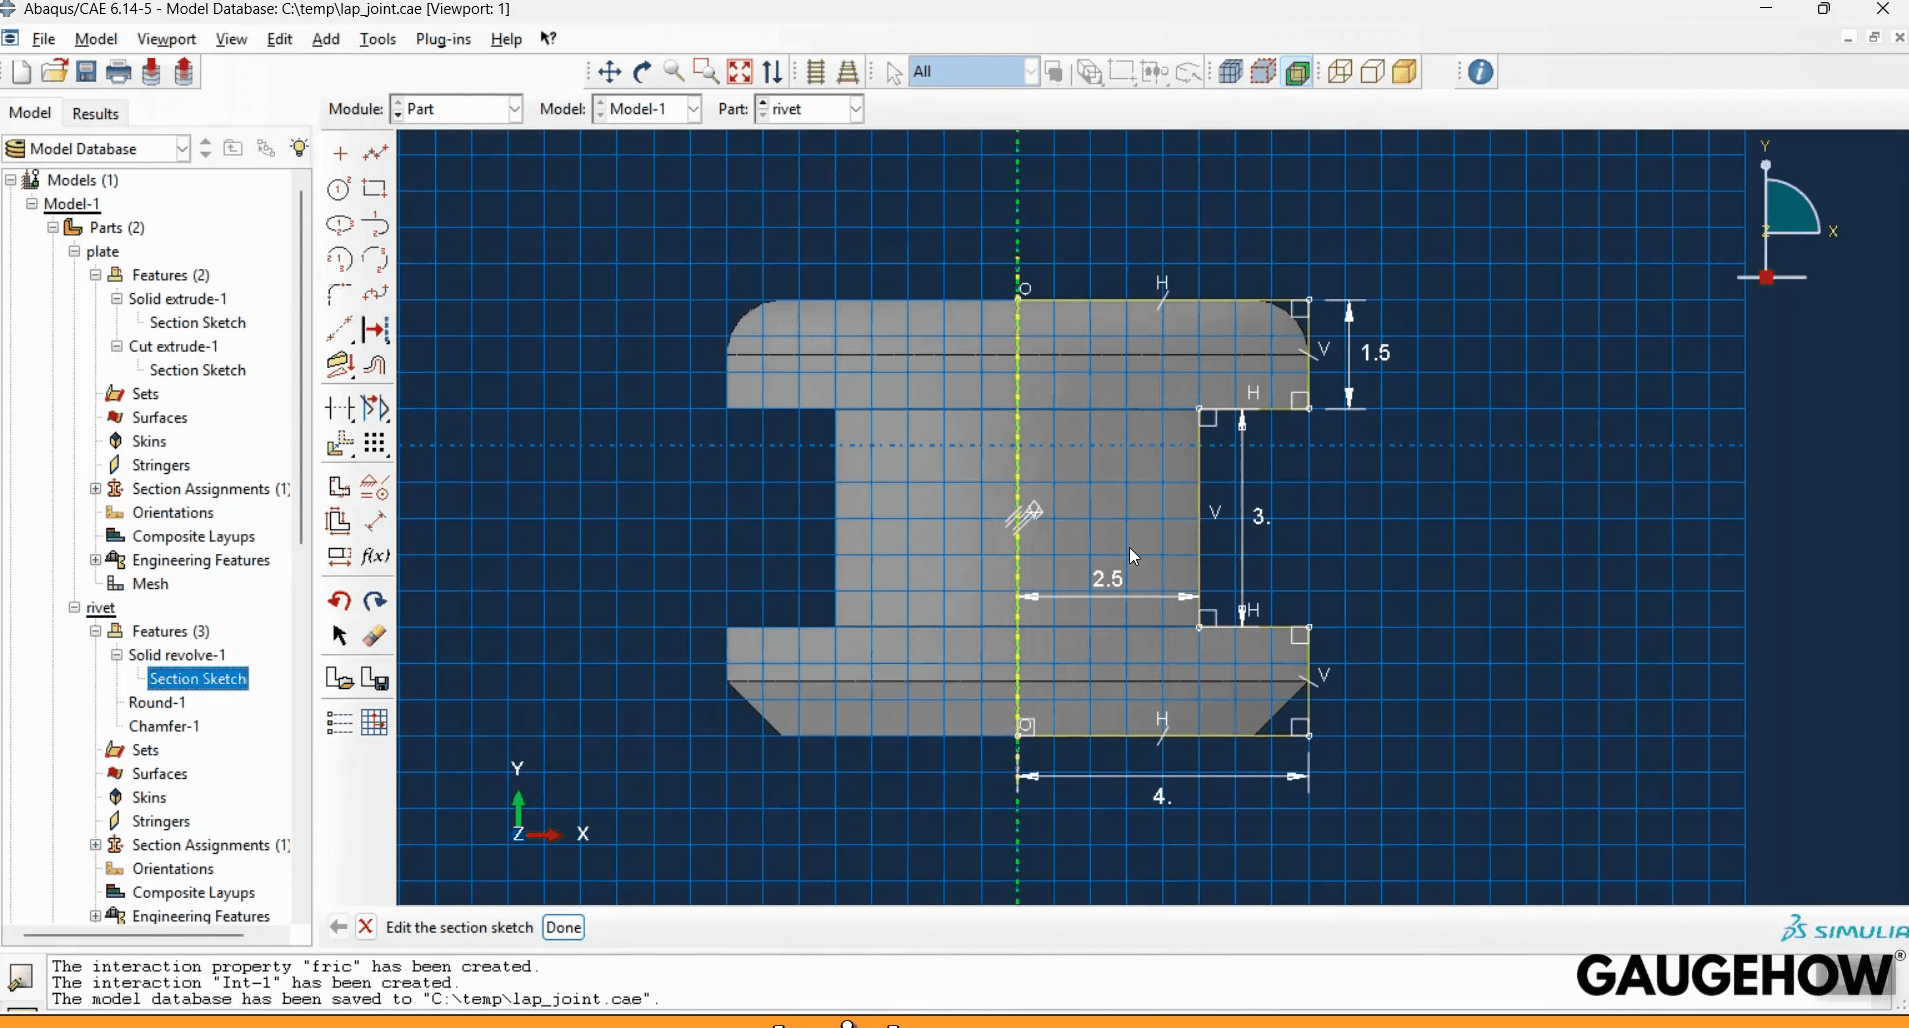
Step 5 - Part Module: Rivet Sketch
After that, assign the material and section, and check that density and stiffness magnitudes fit your chosen unit system.
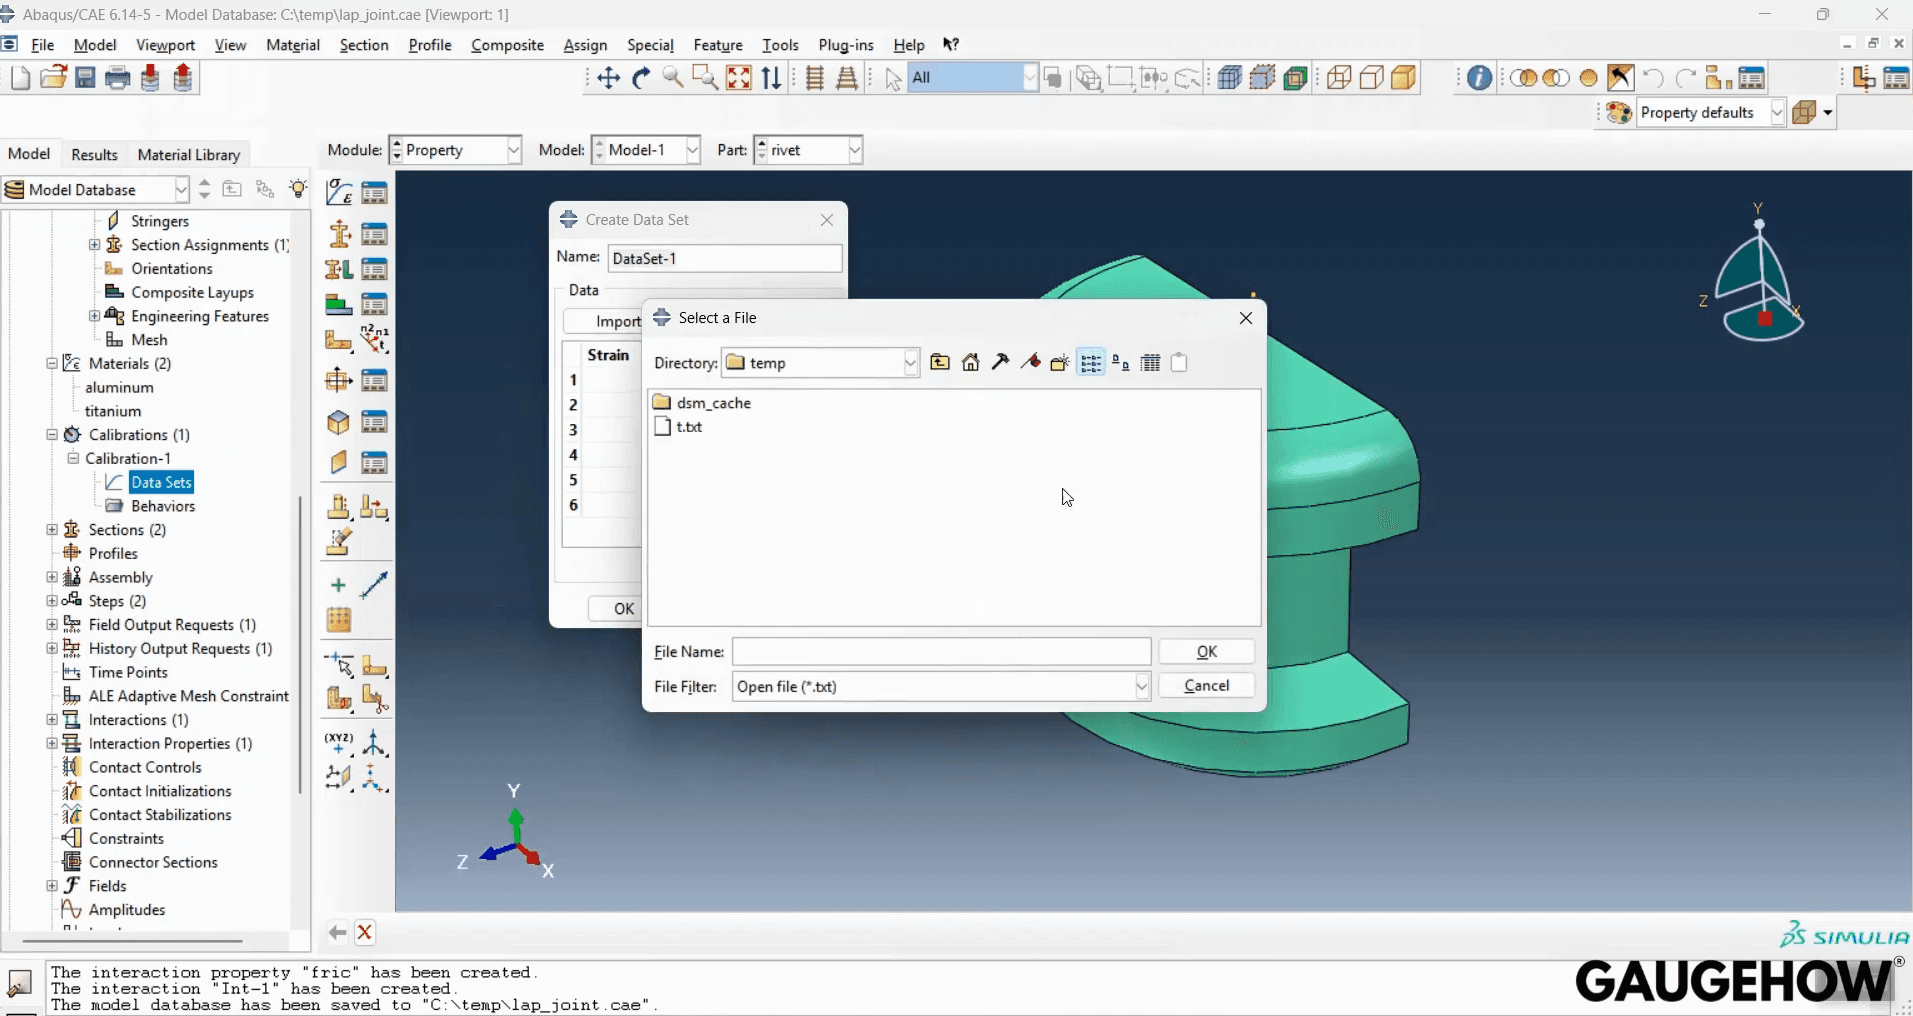
Step 6 - Property Module: Material Data Import/Dataset
At this point, you already have an ABAQUS finite element model skeleton. The sets and surfaces you create now decide how cleanly loads, contact, and outputs behave later.
Solve and review
Keep the first run simple.
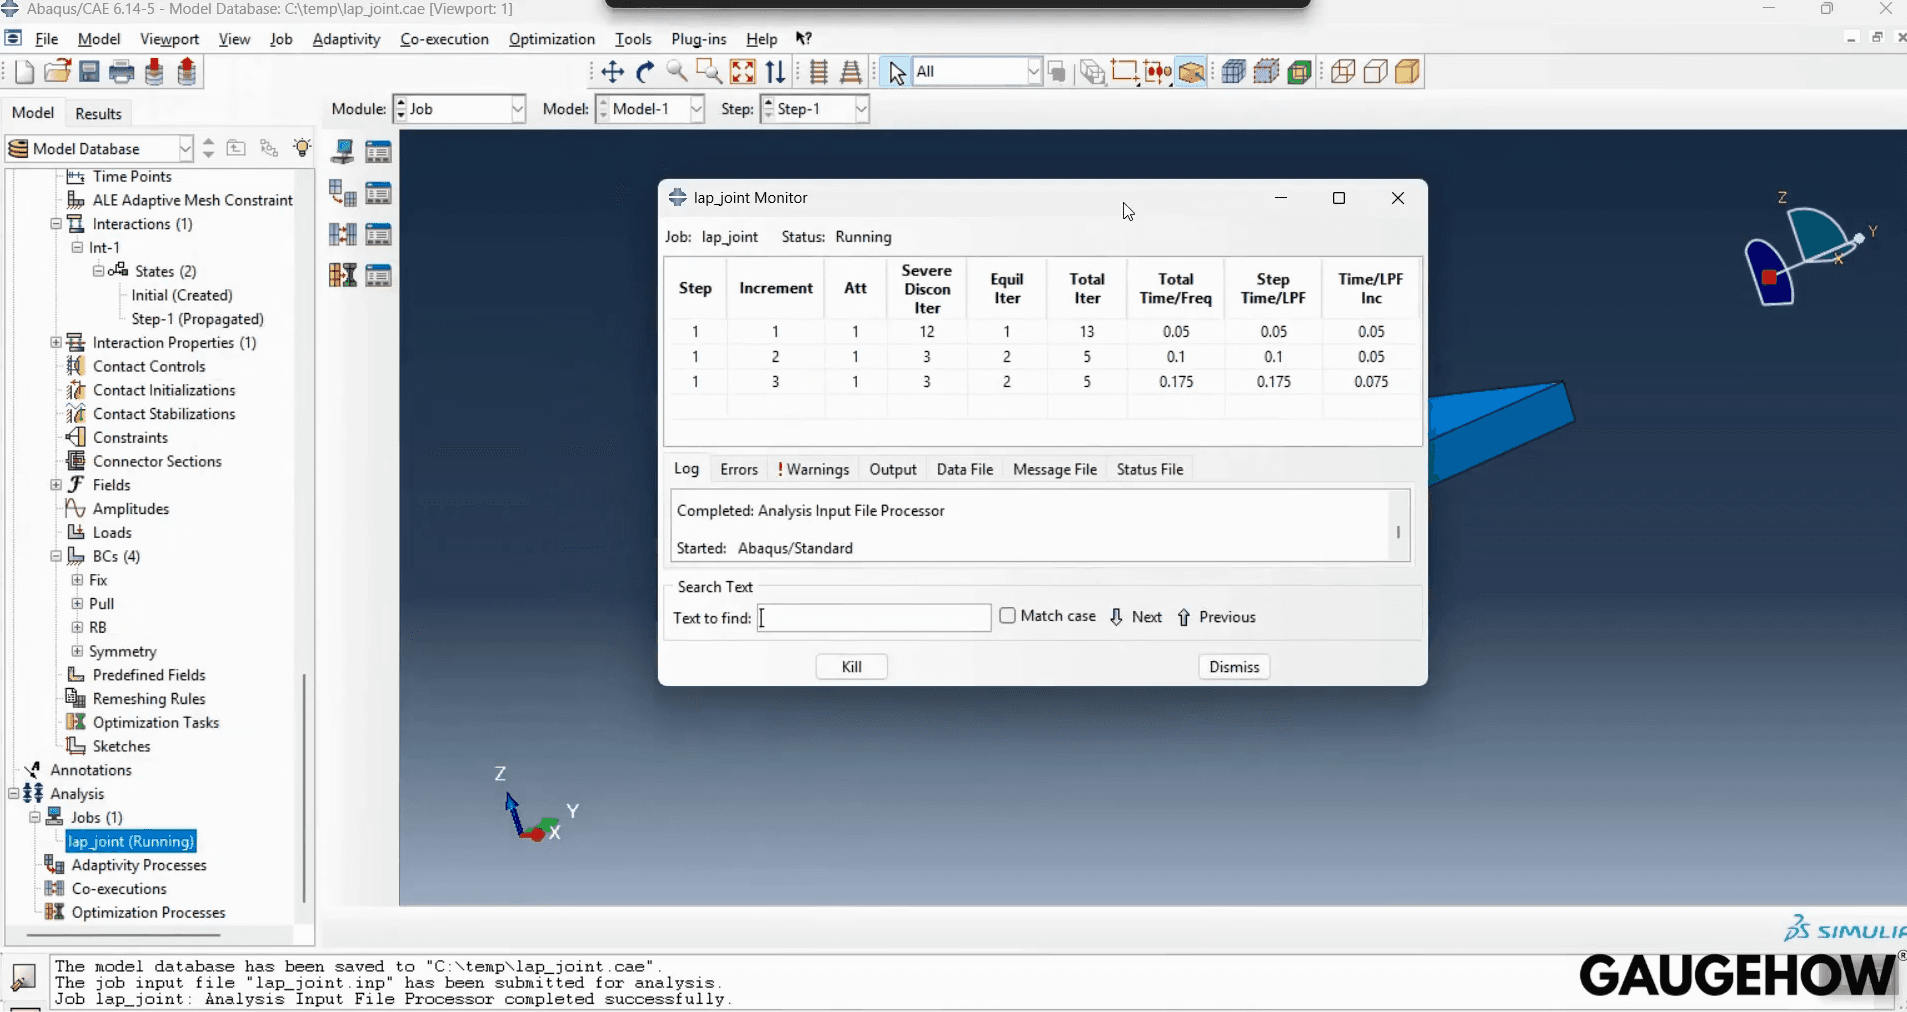
Step 7 - Job Module: Monitor the Run
Use one step, one load case, and linear behavior. You can add contact, plasticity, or dynamics after the pipeline is proven.
Decide outputs before meshing. Ask for one displacement time history and one reaction time history, so you can prove equilibrium and stiffness trend, not just pictures. Set a check that summed reactions match the applied load within 1% on every step.
Mesh with intent. Refine near holes, fillets, and load introduction, and stay coarser where gradients are smooth. This is where Abaqus FEA analysis becomes engineering, because the mesh is a modeling decision, not a UI step.
Here are the checks you should do every run. They are boring, and they are also why models are trusted.
Review checks to do every run
Confirm the sum of reactions matches applied loads.
Read the message and those warnings first.
Step 8 - Job Diagnostics: Warnings + Convergence Evidence
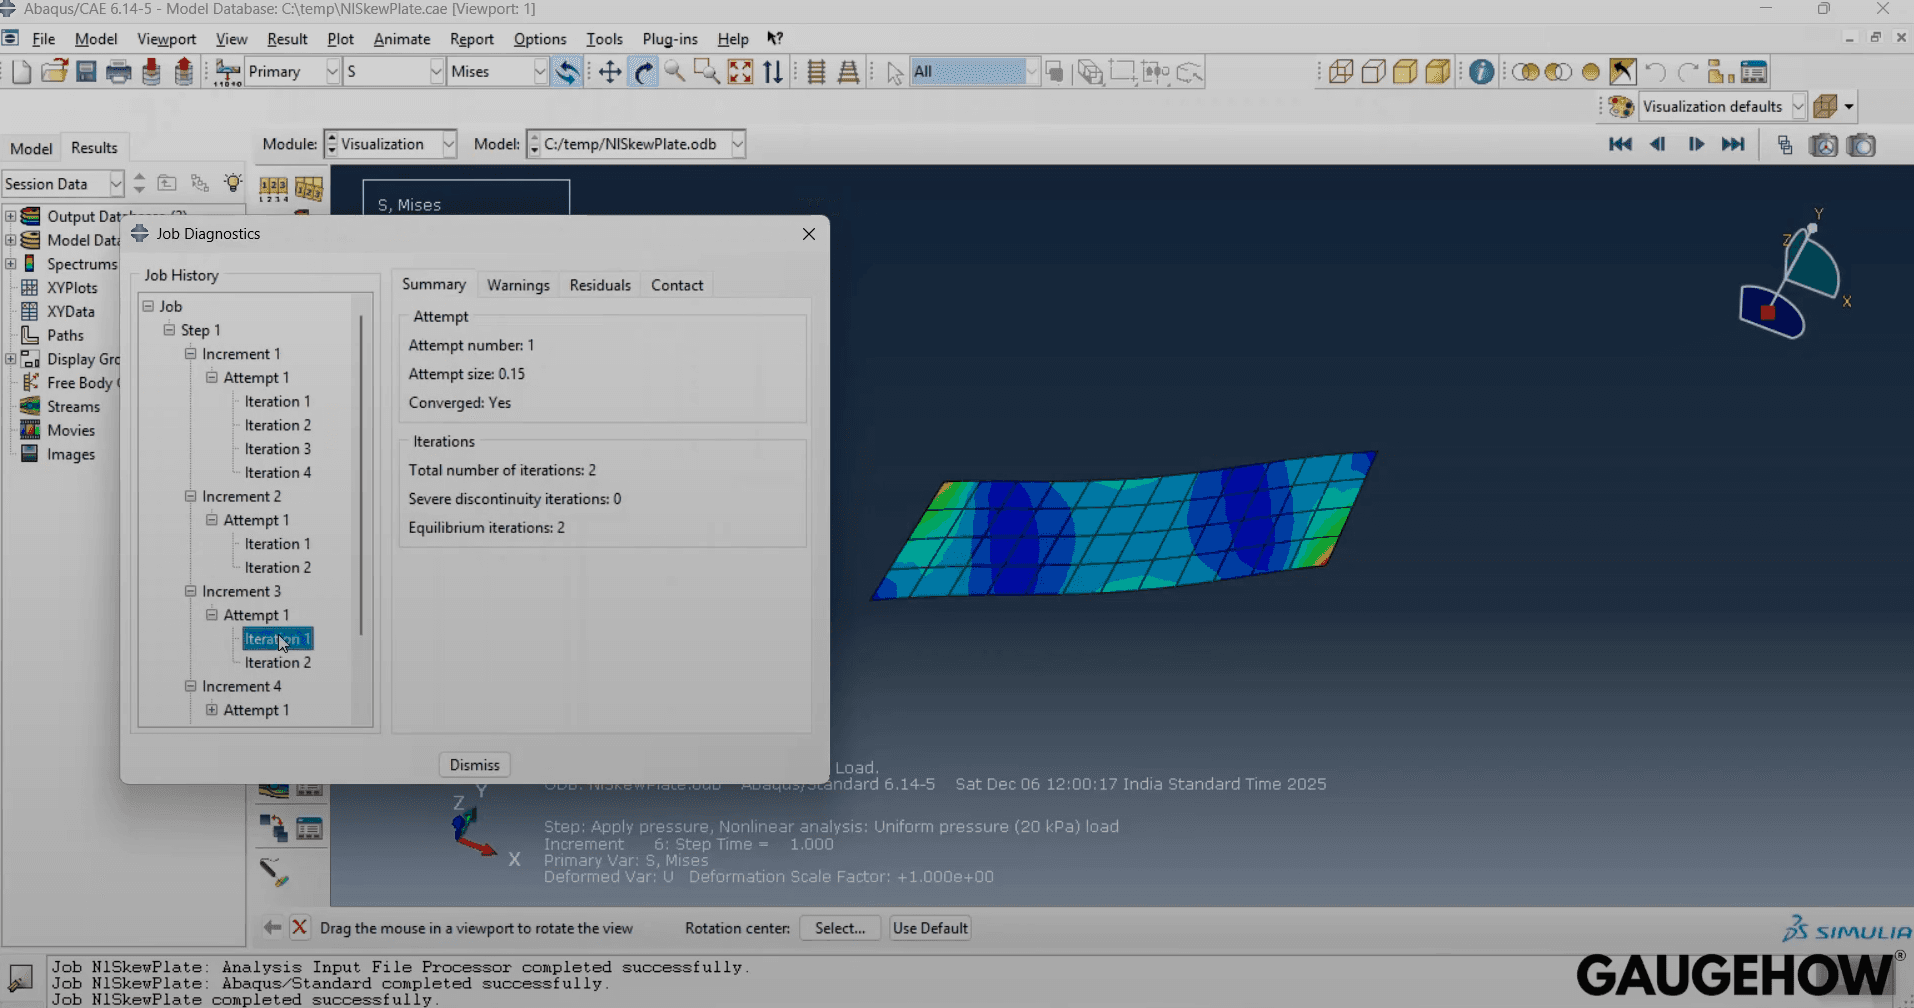
Re-run with one refinement and compare key results.
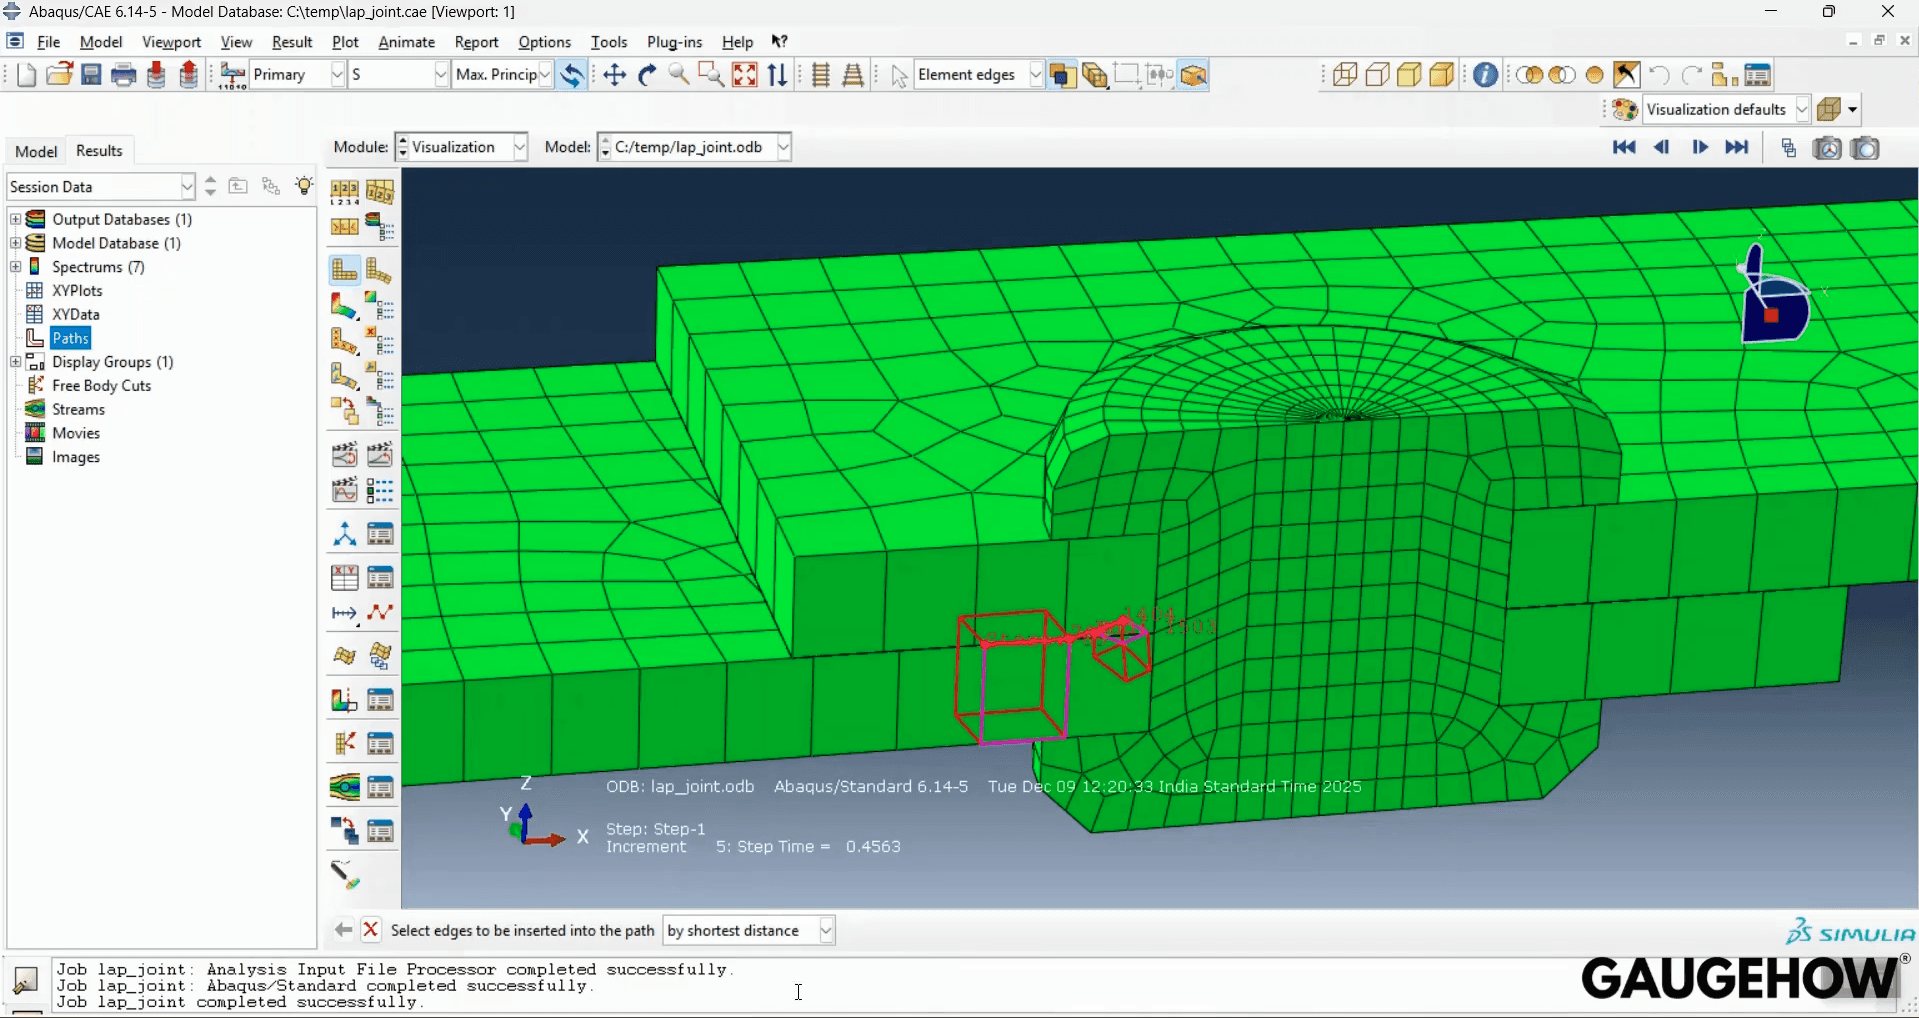
Probe stress away from point loads and sharp corners.
Step 9 - Visualization: Stress Plot + Path Probing
If you are doing FEAs using Abaqus for real decisions, these four checks are the minimum evidence. They also make it easier to debug when the model fails to converge, because you know which assumption broke.
This is the one place we say it plainly. Abaqus software is not the safety net. Your checks are.
Seismic boundaries
This section is about absorbing boundary conditions for seismic analysis in Abaqus.
Use radiation boundaries whenever your soil mesh is finite but the physics should feel infinite. The goal is to let waves leave the model instead of bouncing off the cut faces. A practical implementation is viscous dashpots that represent outward impedance, following the Lysmer and Kuhlemeyer approach and later calibrated variants; log boundary energy to spot reflections.
In practice, two things decide whether the boundary behaves. The boundary must be far enough from the region you care about, and the wave speeds and densities used for damping must be consistent with the soil model. If either is wrong, reflections show up as ringing, phase errors, or artificial amplification.
Most teams get better results by debugging in a fixed order. Move the boundary outward first, then check wave speed inputs, then refine the mesh for the highest frequency content you need. After that, tune the damping details.
Common mistakes that create reflections
The boundary is too close to the structure or source.
Dashpot directions are wrong or incomplete.
Input motion is applied inconsistently on edges.
Rigid body modes are left free, so the domain drifts.
Mesh too coarse for the shortest wavelength.
If you want a simple litmus test, run the same case with a larger domain. If the response stabilizes, your issue was truncation, not solver behavior.
That is the practical core of absorbing boundary conditions for seismic analysis in Abaqus. It is mostly geometry, wave speeds, and resolution.
Final reminder: In seismic runs, nonreflecting edges are not decoration. They sit inside the physics model, so treat them like material data, and validate with one metric such as peak surface acceleration drift between mesh truncations.
FAQ
Is ABAQUS software free for beginners?
If you are learning, the Learning Edition is the safest start because it is designed for training and includes documentation. It is not the same as a full commercial license, but it is enough to learn the complete workflow and build good habits before you move into larger industrial models.
How do I choose ABAQUS units for my model?
Pick one consistent unit system before you enter any value. Then sanity check one number by hand, like stiffness order of magnitude or expected deflection trend. After the first run, confirm the deformation scale and reaction levels match what your intuition expects, because mixed units often look “smooth” but wrong.
Where do I find the ABAQUS manual and ABAQUS documentation?
Use the option reference when you need exact syntax and meaning. Use the task-based guides when you need the step-by-step module flow and examples. If you are on Learning Edition, the documentation set is included with it, so you can rely on it as your baseline reference.
What is the safest workflow for FEAs using Abaqus on day one?
Start linear and small. Use one step, one load case, and a geometry that is easy to reason about, then do four checks every time: reaction balance, warning scan, one mesh refinement comparison, and stress probing away from singularities. Only after that should you add contact, plasticity, or dynamics.
When should I use infinite elements or viscous boundaries for seismic waves?
Use them when reflections from the truncated boundary can contaminate the response in the region you care about. If your model is wave-driven or soil domain-based, boundary placement and damping choices matter as much as mesh size. A good first diagnostic is to move the boundary farther out and see if the response stabilizes.
Conclusion
You now have a repeatable workflow: map the modules, build clean sets and surfaces, lock units early, run a small first case, and then prove the result with reaction balance, warning review, a mesh sensitivity pass, and stress probing away from singularities.
You also saw when seismic style boundaries matter, and how reflections usually come from boundary distance, wave speed inputs, and coarse meshes, not from “solver magic.” If you want a guided, practice-first path with exercises and review checklists, visit our Abaqus course and follow the same workflow until it becomes automatic.
CAD-CAM-CAE Work Platform
Find or Post CAD, CAM and CAE freelance projects, full-time jobs and Internships.
GaugeHow is the platform built for core engineering work. Whether you need a freelancer for a CAD project, a full-time hire, or an engineering intern,post it here and get matched with the right person.
Our Courses
Complete Course Library
Access to 40+ courses covering various fields like Design, Simulation, Quality, Manufacturing, Robotics, and more.