10 Types of Gauges in Metrology (Go/No-Go Explained)

Precision manufacturing lives or dies on tolerance control, and metrology is the discipline that keeps that control real.
In this article, "Types of Gauges" refers to dimensional metrology gauges used for inspection and acceptance checking in manufacturing, not to pressure gauges or process instrumentation.
When a process is stable, gauges give a faster, more repeatable accept or reject decision than chasing numbers on every part.
What Are Gauges in Metrology?
Gauges are engineered checks designed around the minimum and maximum acceptable limits of a dimension so an inspector can make a direct acceptability decision.
They protect production by making the “yes” or “no” call consistent across operators, shifts, and workholding, especially when speed matters and the tolerance window is tight.
A practical way to run this list is to pick the feature first, then match the inspection moment, and only then think about convenience. The table below is deliberately shop-floor specific, so selection stays grounded in real inspection flow.
Role | Feature | Best moment | Strength | Misuse to avoid |
OD ring gage | OD | Final / in-process | Uniform contact, stable feel | Forcing over burrs |
Open-frame snap gauge | OD/step | In-process | Fast access at shoulders | Inconsistent seating force |
Caliper | OD / ID/depth | Setup / first-off | Quick feedback for adjustment | Used for tight acceptance |
Wire size plate | Wire size | Incoming / sorting | Rapid classification | Mixing standards blindly |
Height gage | Height from datum | Set up / inspection bench | Datum-based checks | Dirty base or datum |
Plain plug gauge | ID/bore | In-process / final | Simple accept/reject | Pushing through a bell-mouth |
Feeler leaf set | Gap/clearance | Setup/assembly | Direct gap confirmation | Stacking bent leaves |
Radius leaf set | Radius / fillet | Final / audit | Quick profile match | Reading partial contact as OK |
Pitch leaf set | Thread pitch | Setup | Fast pitch identification | Partial engagement inthe thread |
Dial indicator | Variation/runout | Setup | Shows change instantly | Weak fixturing, chasing noise |
Use this four-step selection rule to stay consistent under production pressure: Feature → Decision type (pass/fail vs reading) → Speed → Risk.
That sequence is how to choose the right gauge in metrology without letting habit override tolerance reality.
Ring Gauge
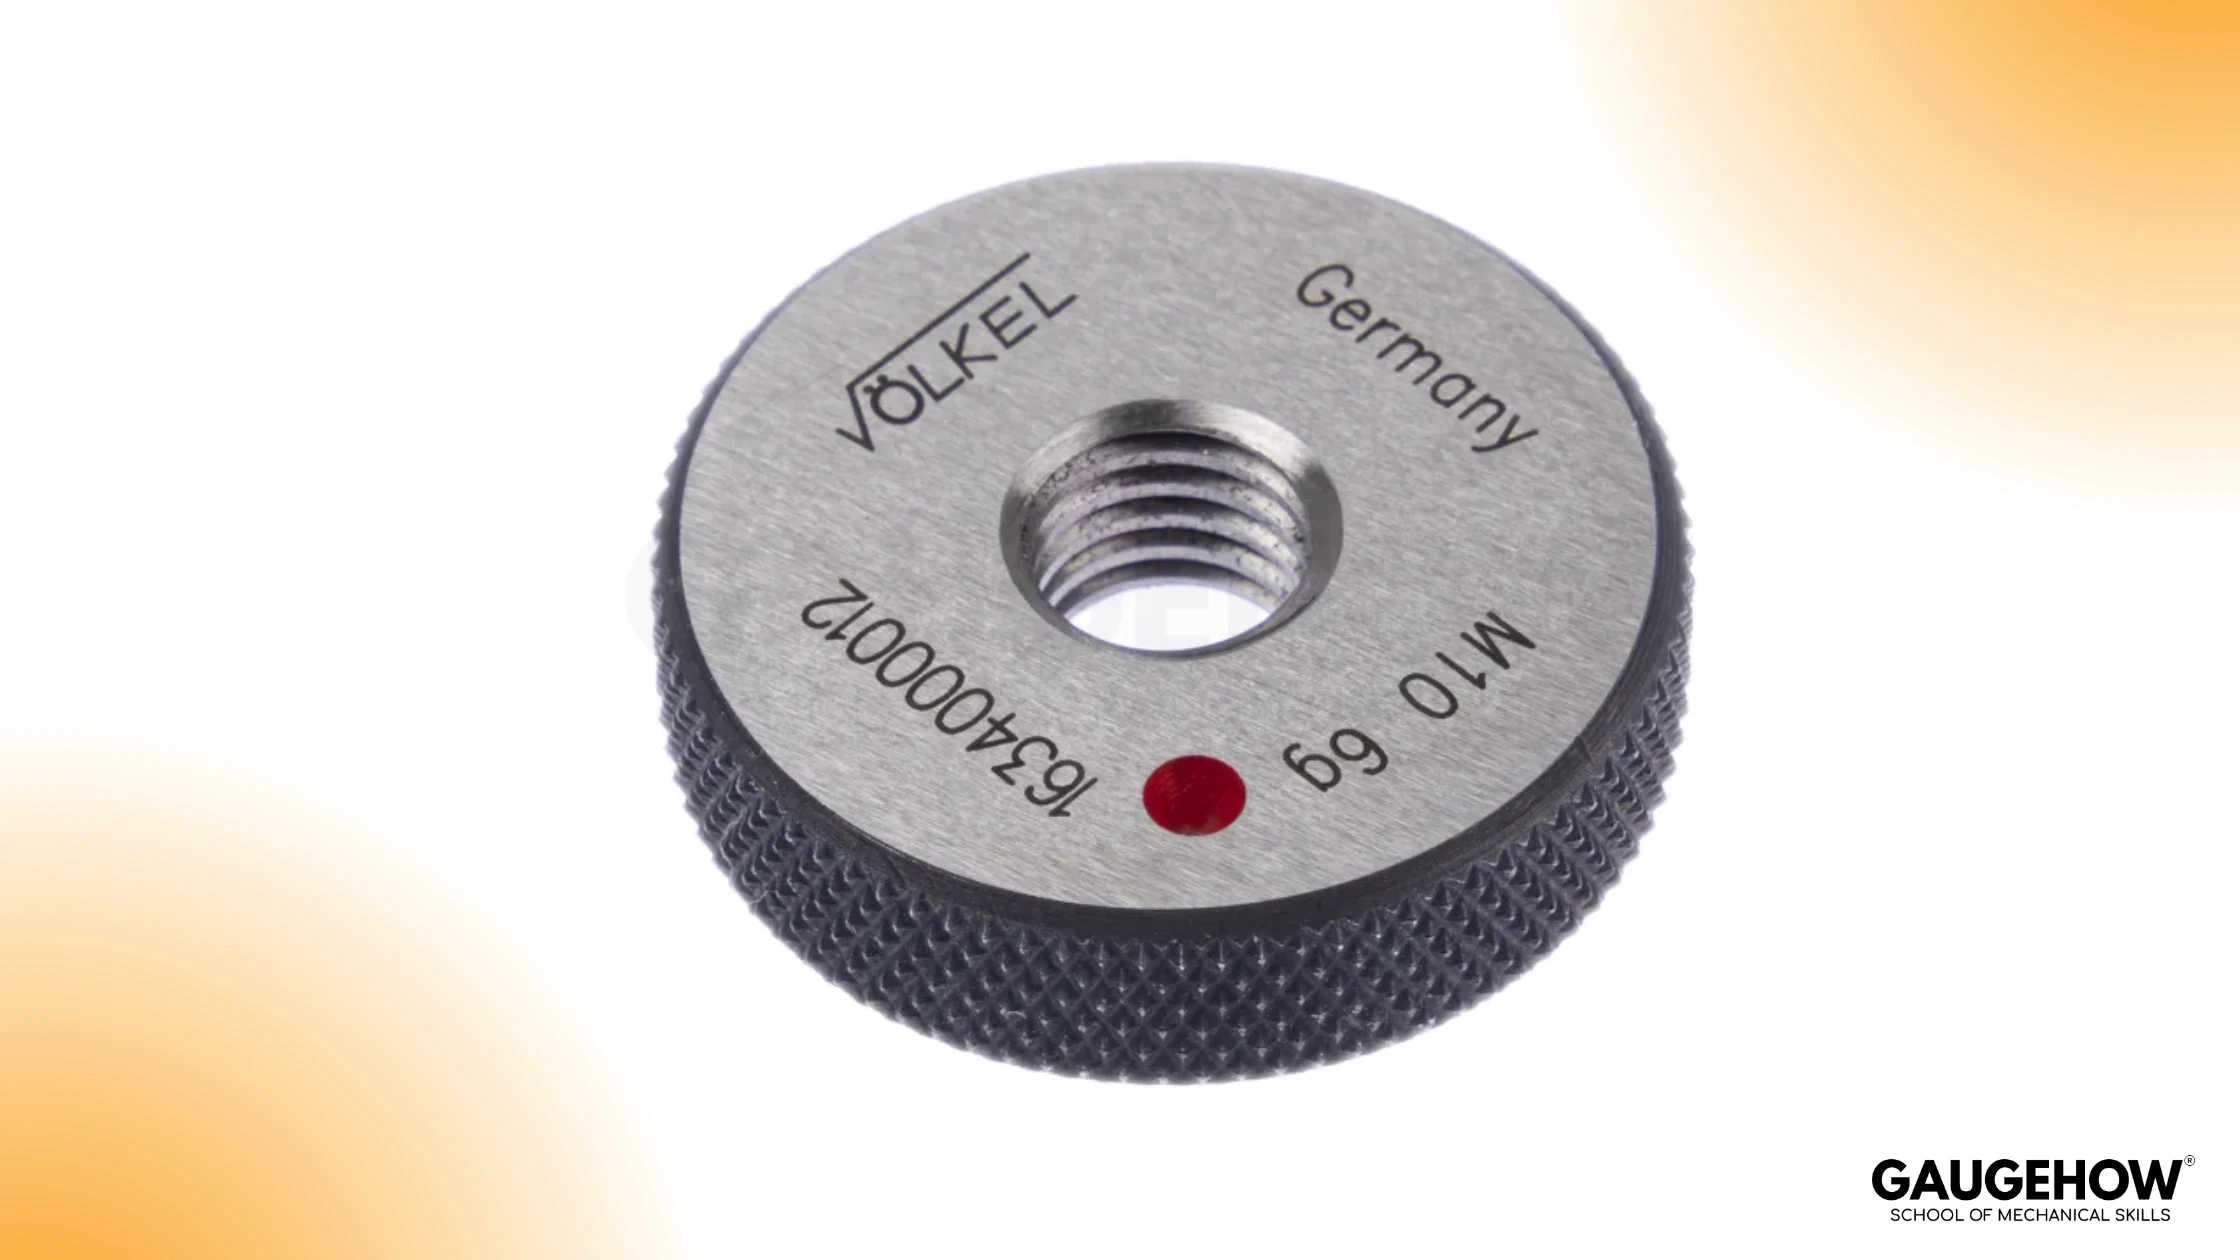
On shafts and pins, a ring gauge is the cleanest way to judge external diameter acceptance because it surrounds the feature and averages contact around the circumference. That makes the decision less sensitive to operator technique than point-contact tools, which matters when multiple inspectors touch the same line.
In practice, the failure mode is almost never mysterious. A burr at the edge, a dirty surface, or a warm part can turn a correct diameter into a false reject. If the part “needs a push” to enter, treat that as a process signal, not something to be overridden by force.
Snap Gauge

This tool exists for access and throughput. The open frame lets an inspector check an OD at a shoulder, on a stepped feature, or mid-length without sliding over an end, which is exactly where closed checks slow down production and introduce handling variation.
Reliability depends on consistent seating and consistent pressure. If two inspectors get different outcomes on the same feature, suspect the technique and seating first. A snap gauge that feels “fast but fussy” is usually applied at an angle or on a surface that is not clean.
Caliper Gauge
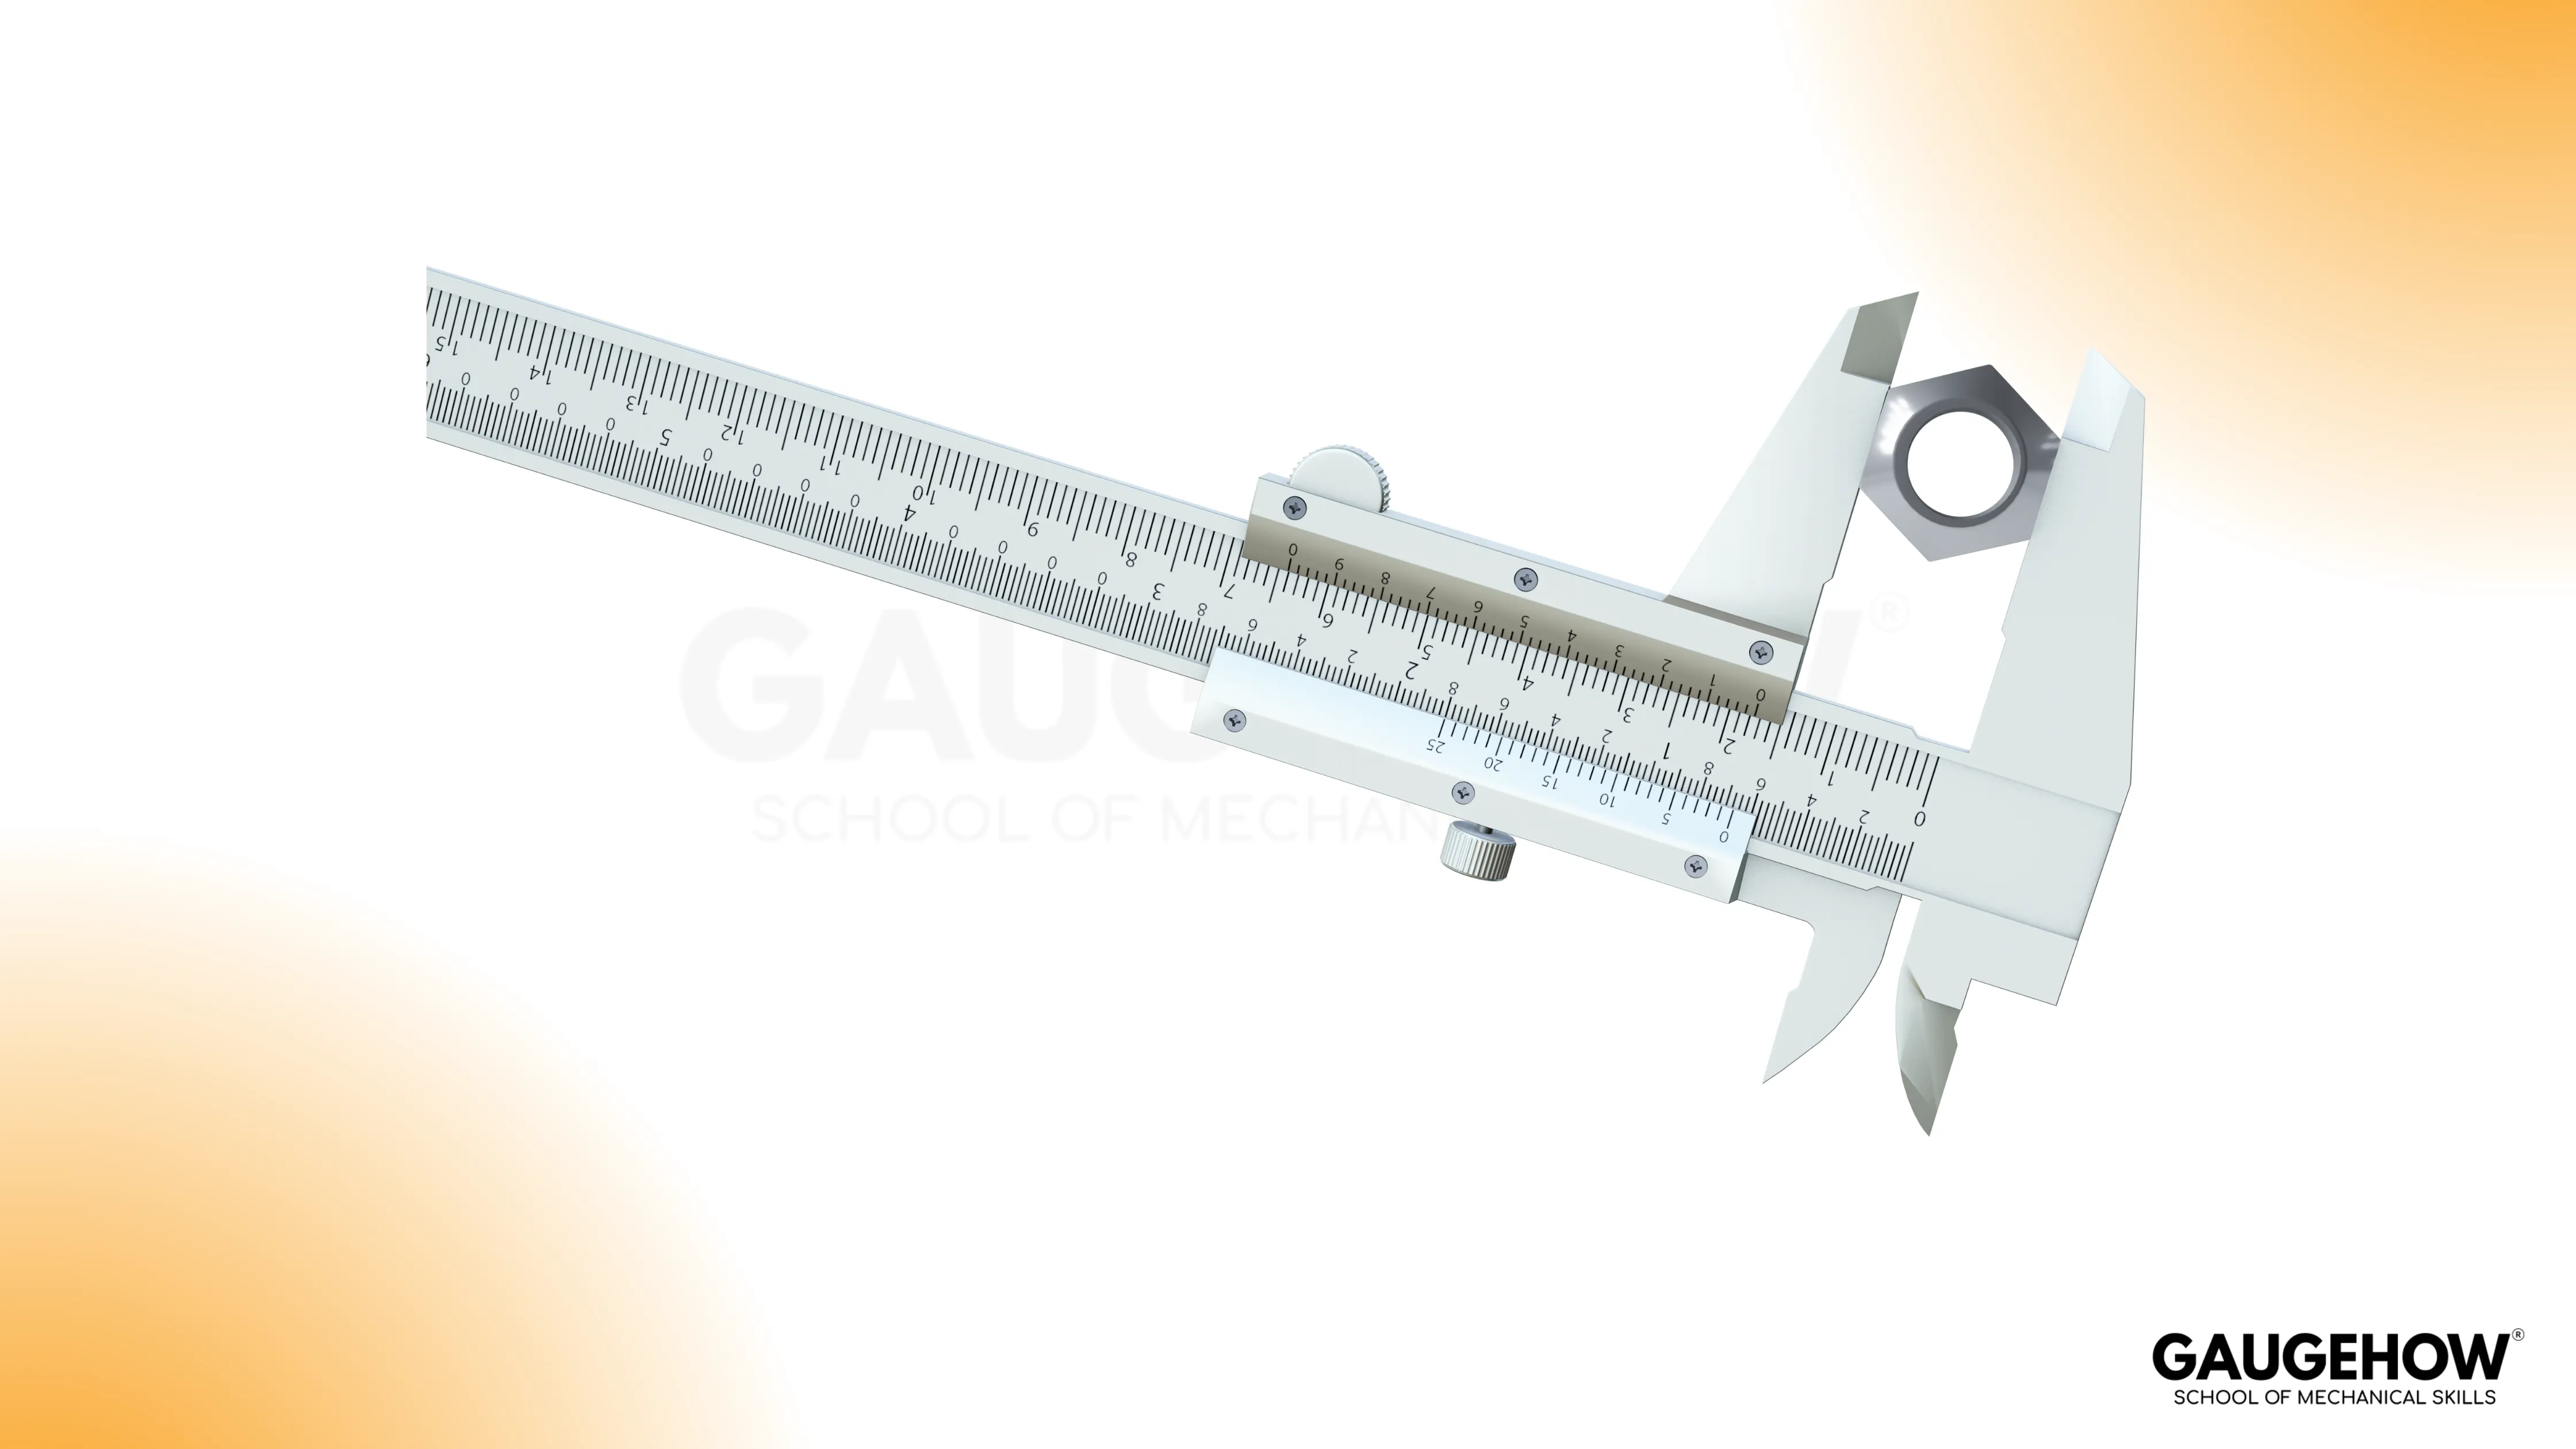
A caliper earns its place as a setup verification tool because it gives rapid directional feedback when dialing in a process. It is not built to be the final authority on tight tolerance acceptance because results shift with measuring force, jaw condition, and operator handling.
Use it to confirm you are close, then hand off acceptance to a controlled check when the tolerance demands it. A solid habit is to zero before a critical check and repeat the reading with the same hand pressure; if the value drifts with grip, the tool is warning you.
Wire Gauge
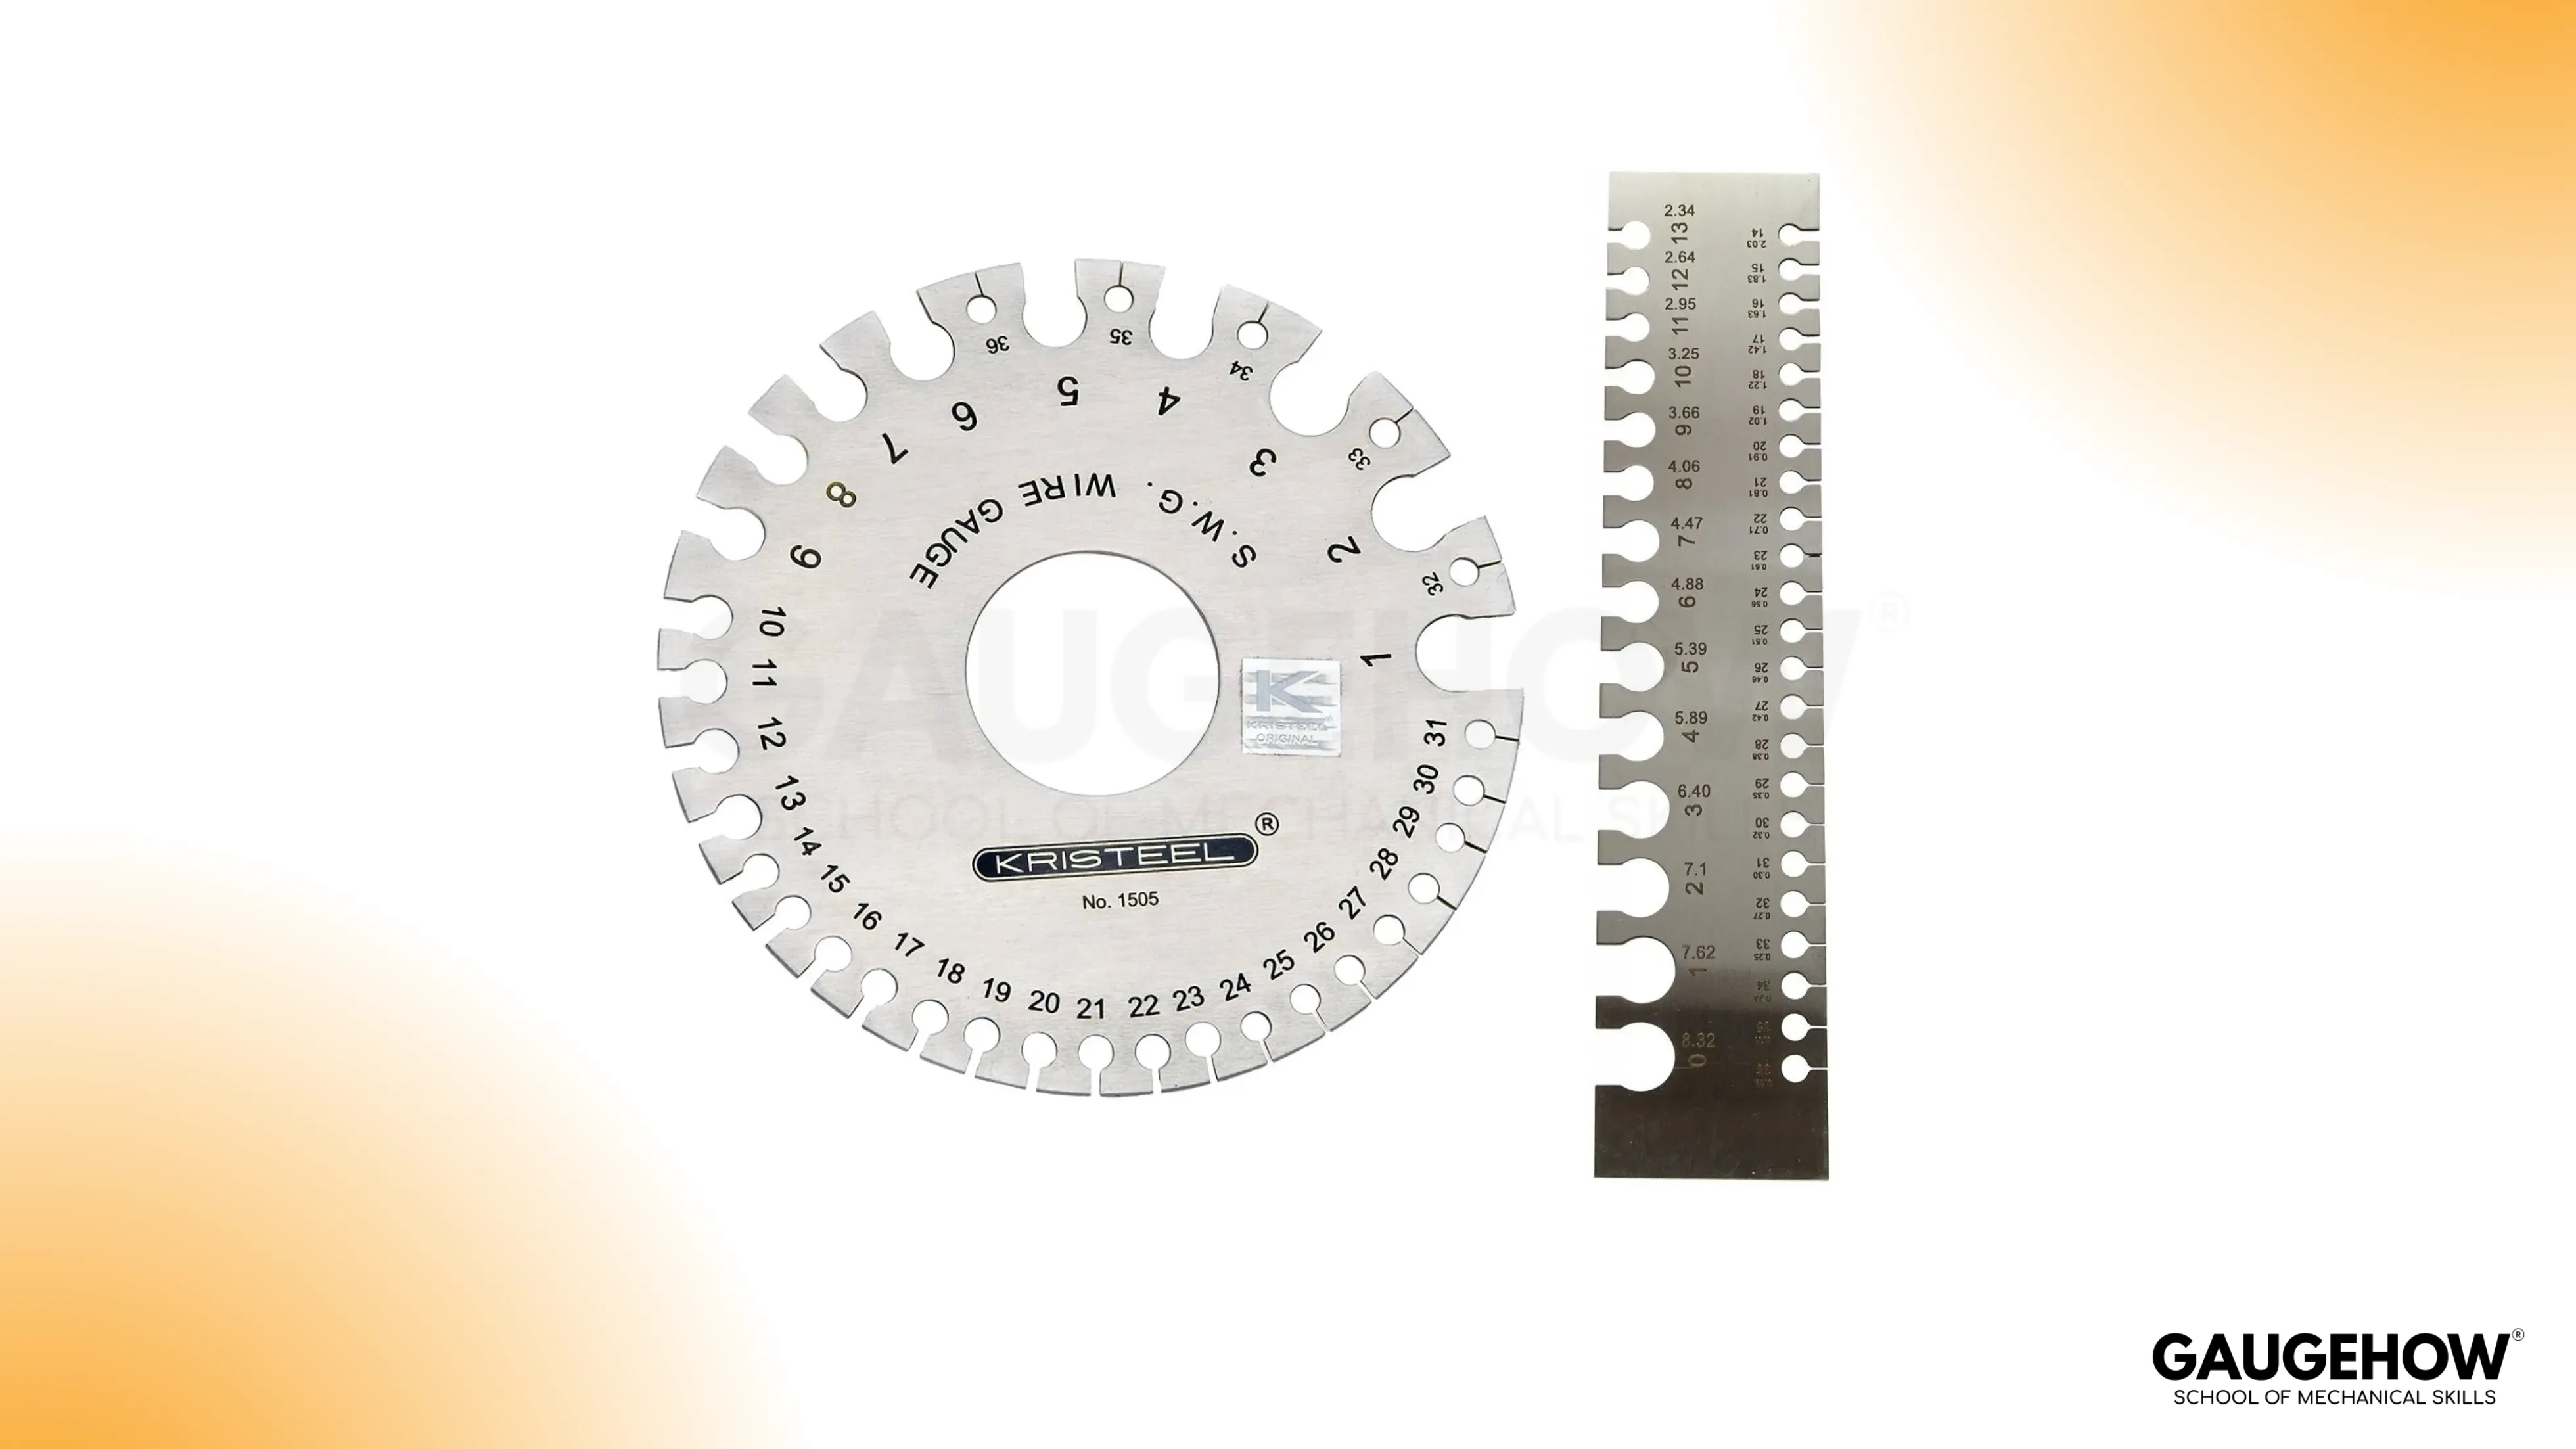
A wire gauge is a classification tool. It sorts and identifies wire size quickly, but it is standard-sensitive, meaning the result only has meaning when the correct sizing system is being used for the job.
The sharp edge here is the assumption. A wire that has been flattened, stretched, or nicked can “pass” a slot while still being wrong for the function. A reliable habit is to confirm the applicable standard once per job and check an undamaged wire section, not the end that has been handled.
Height Gauge

A height gauge is a datum-driven instrument that checks height from a reference plane, typically on a surface plate. It becomes valuable when the dimension’s meaning depends on the datum, not just the number, such as layout work, step heights, and feature locations tied to a base surface.
Most errors come from dirty contact surfaces and unstable seating, not from the scale. If the base is not clean or the part is rocking, the reading is a story, not a measurement. A practical habit is to wipe the base and datum surface before each critical check and confirm zero before trusting a scribe or indicator contact.
🔧 Trusted by 23,000+ Happy Learners
Industry-Ready Skills for Mechanical Engineers
Upskill with 40+ courses in Design/CAD, Simulation, FEA/CFD, Manufacturing, Robotics & Industry 4.0.
Plug Gauge
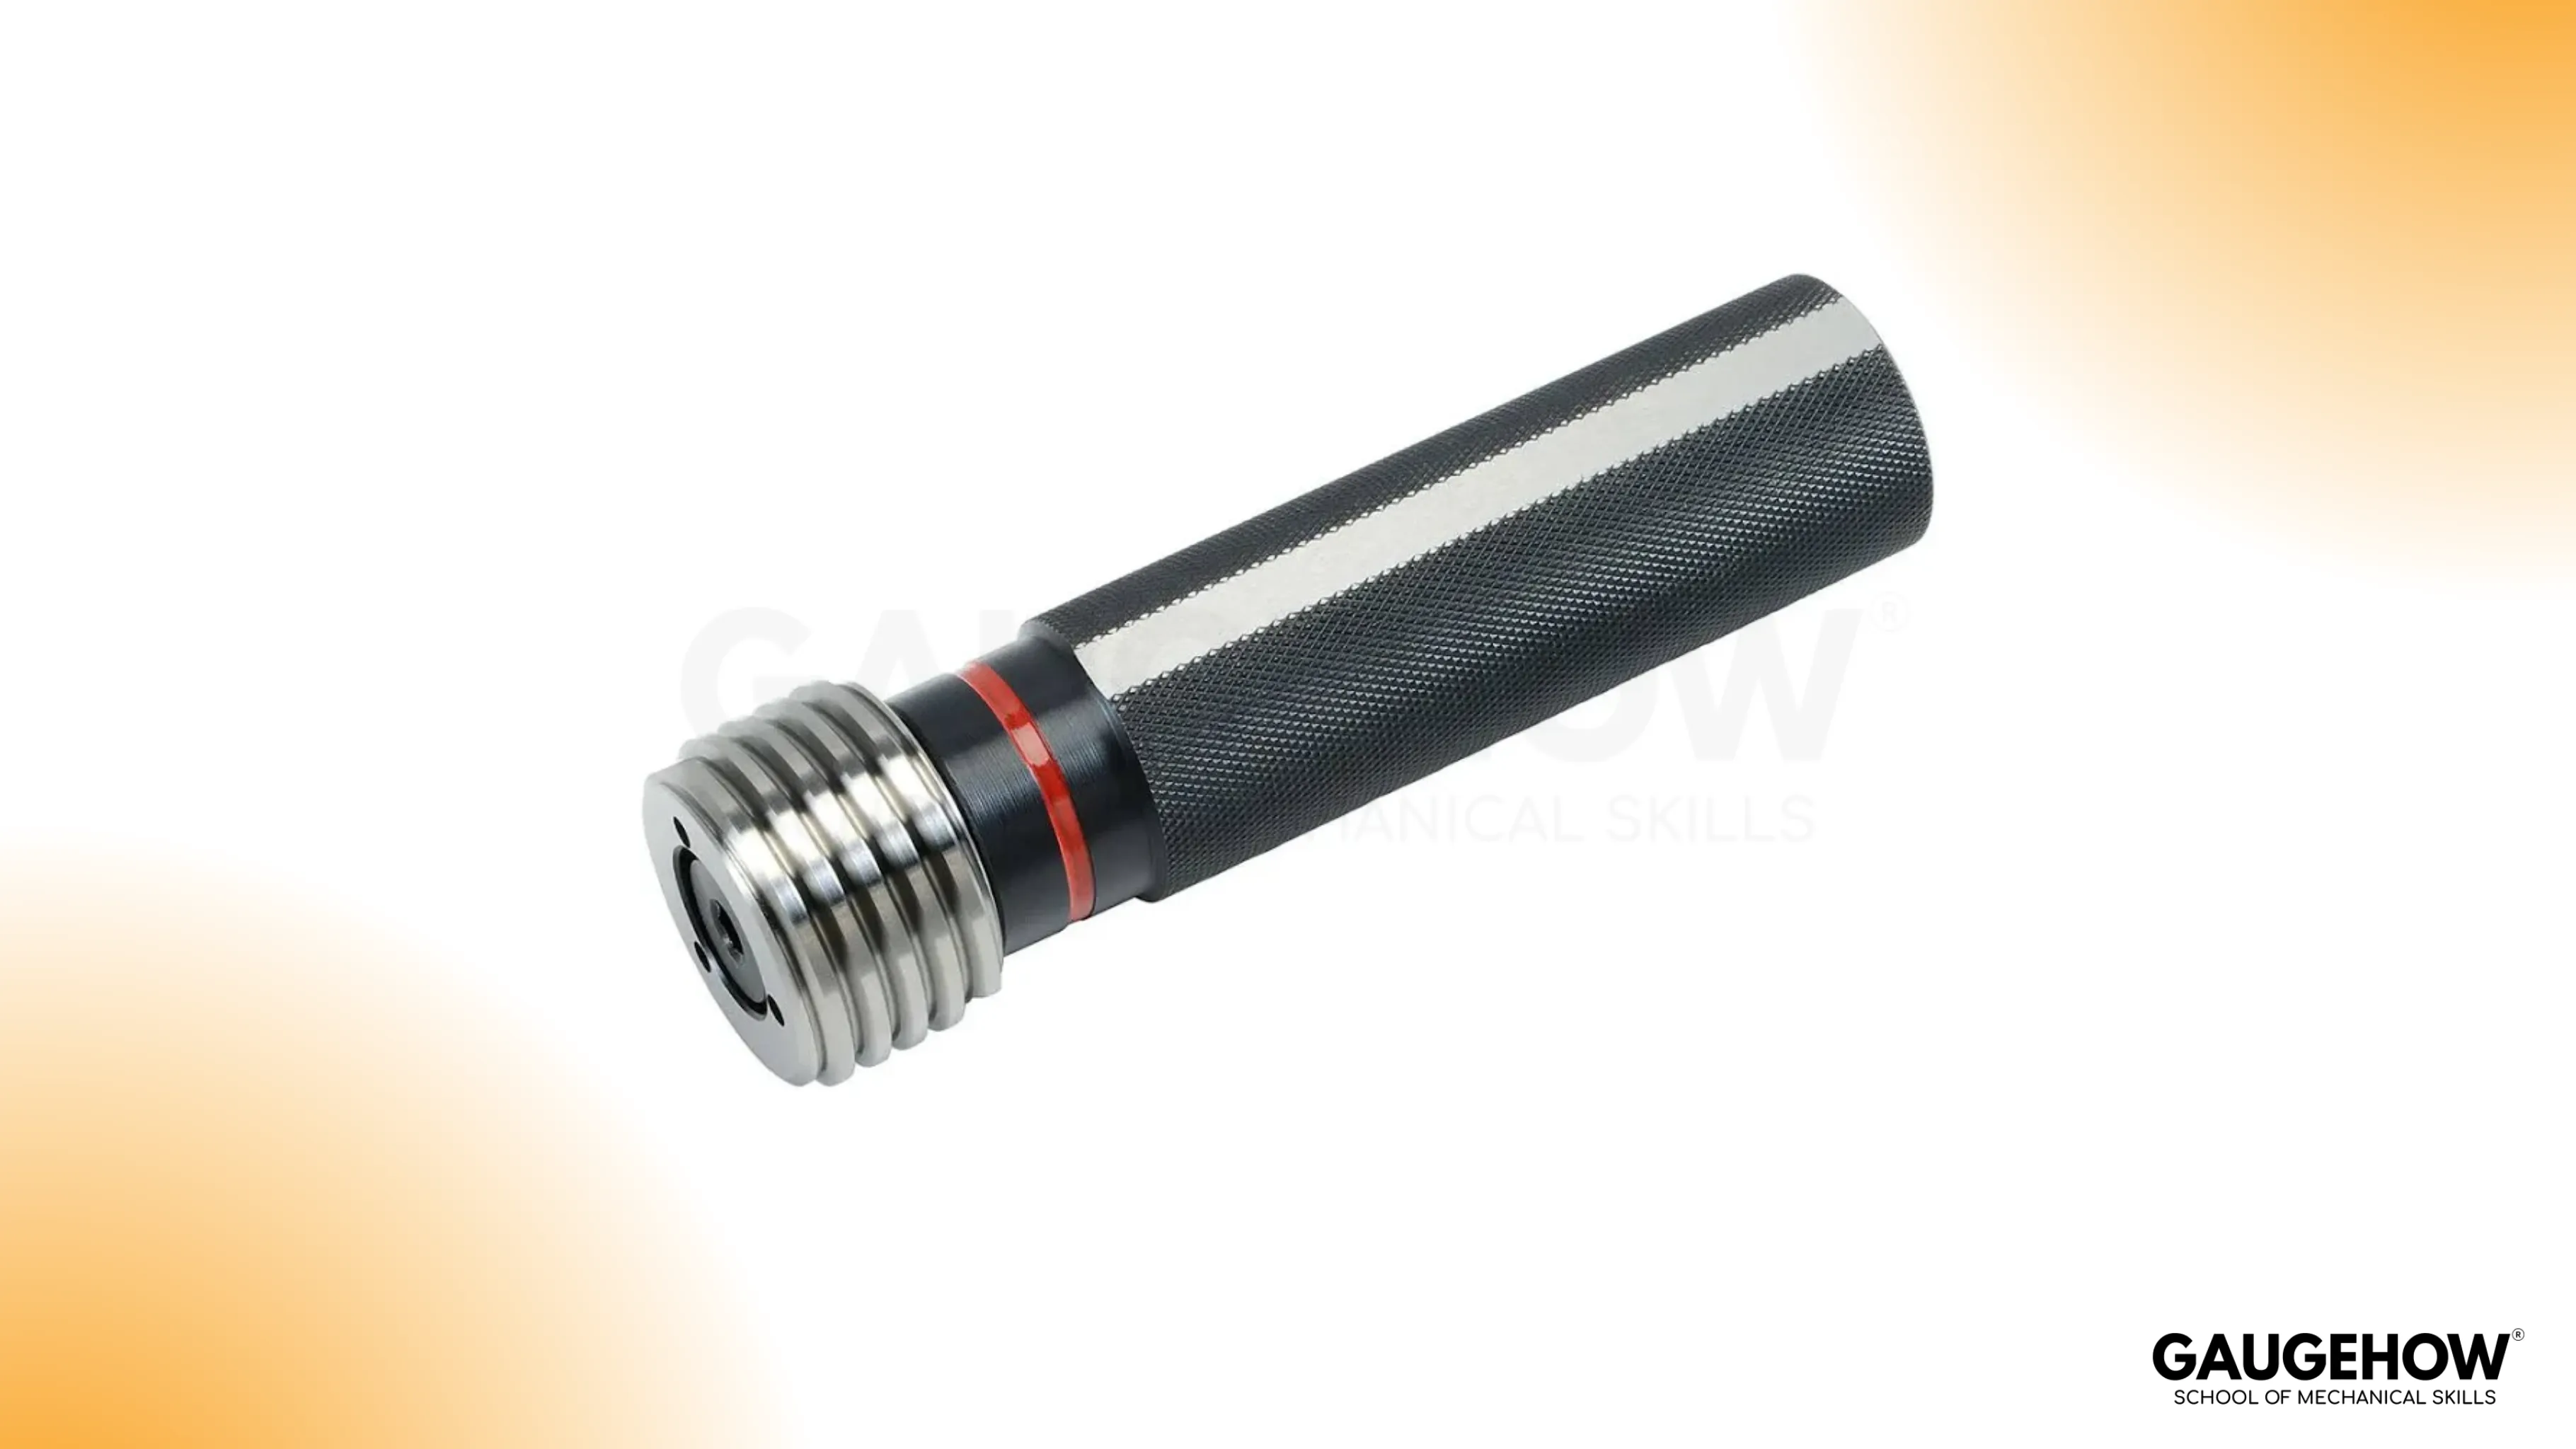
For bores and holes, a Plug gauge provides a fast acceptance decision without turning every check into a measurement exercise. It is the right tool when the question is whether the hole is inside limits, and the process is capable enough that pass/fail control is the sensible way to protect assembly.
Technique decides accuracy. A dirty bore or a slight bell-mouth can make the Go end feel wrong, and forcing the tool can hide the true condition. If a No-Go end begins to “start” after months of service, assume tool wear and handling damage first, not a sudden process miracle.
Feeler Gauge (thickness gauge)
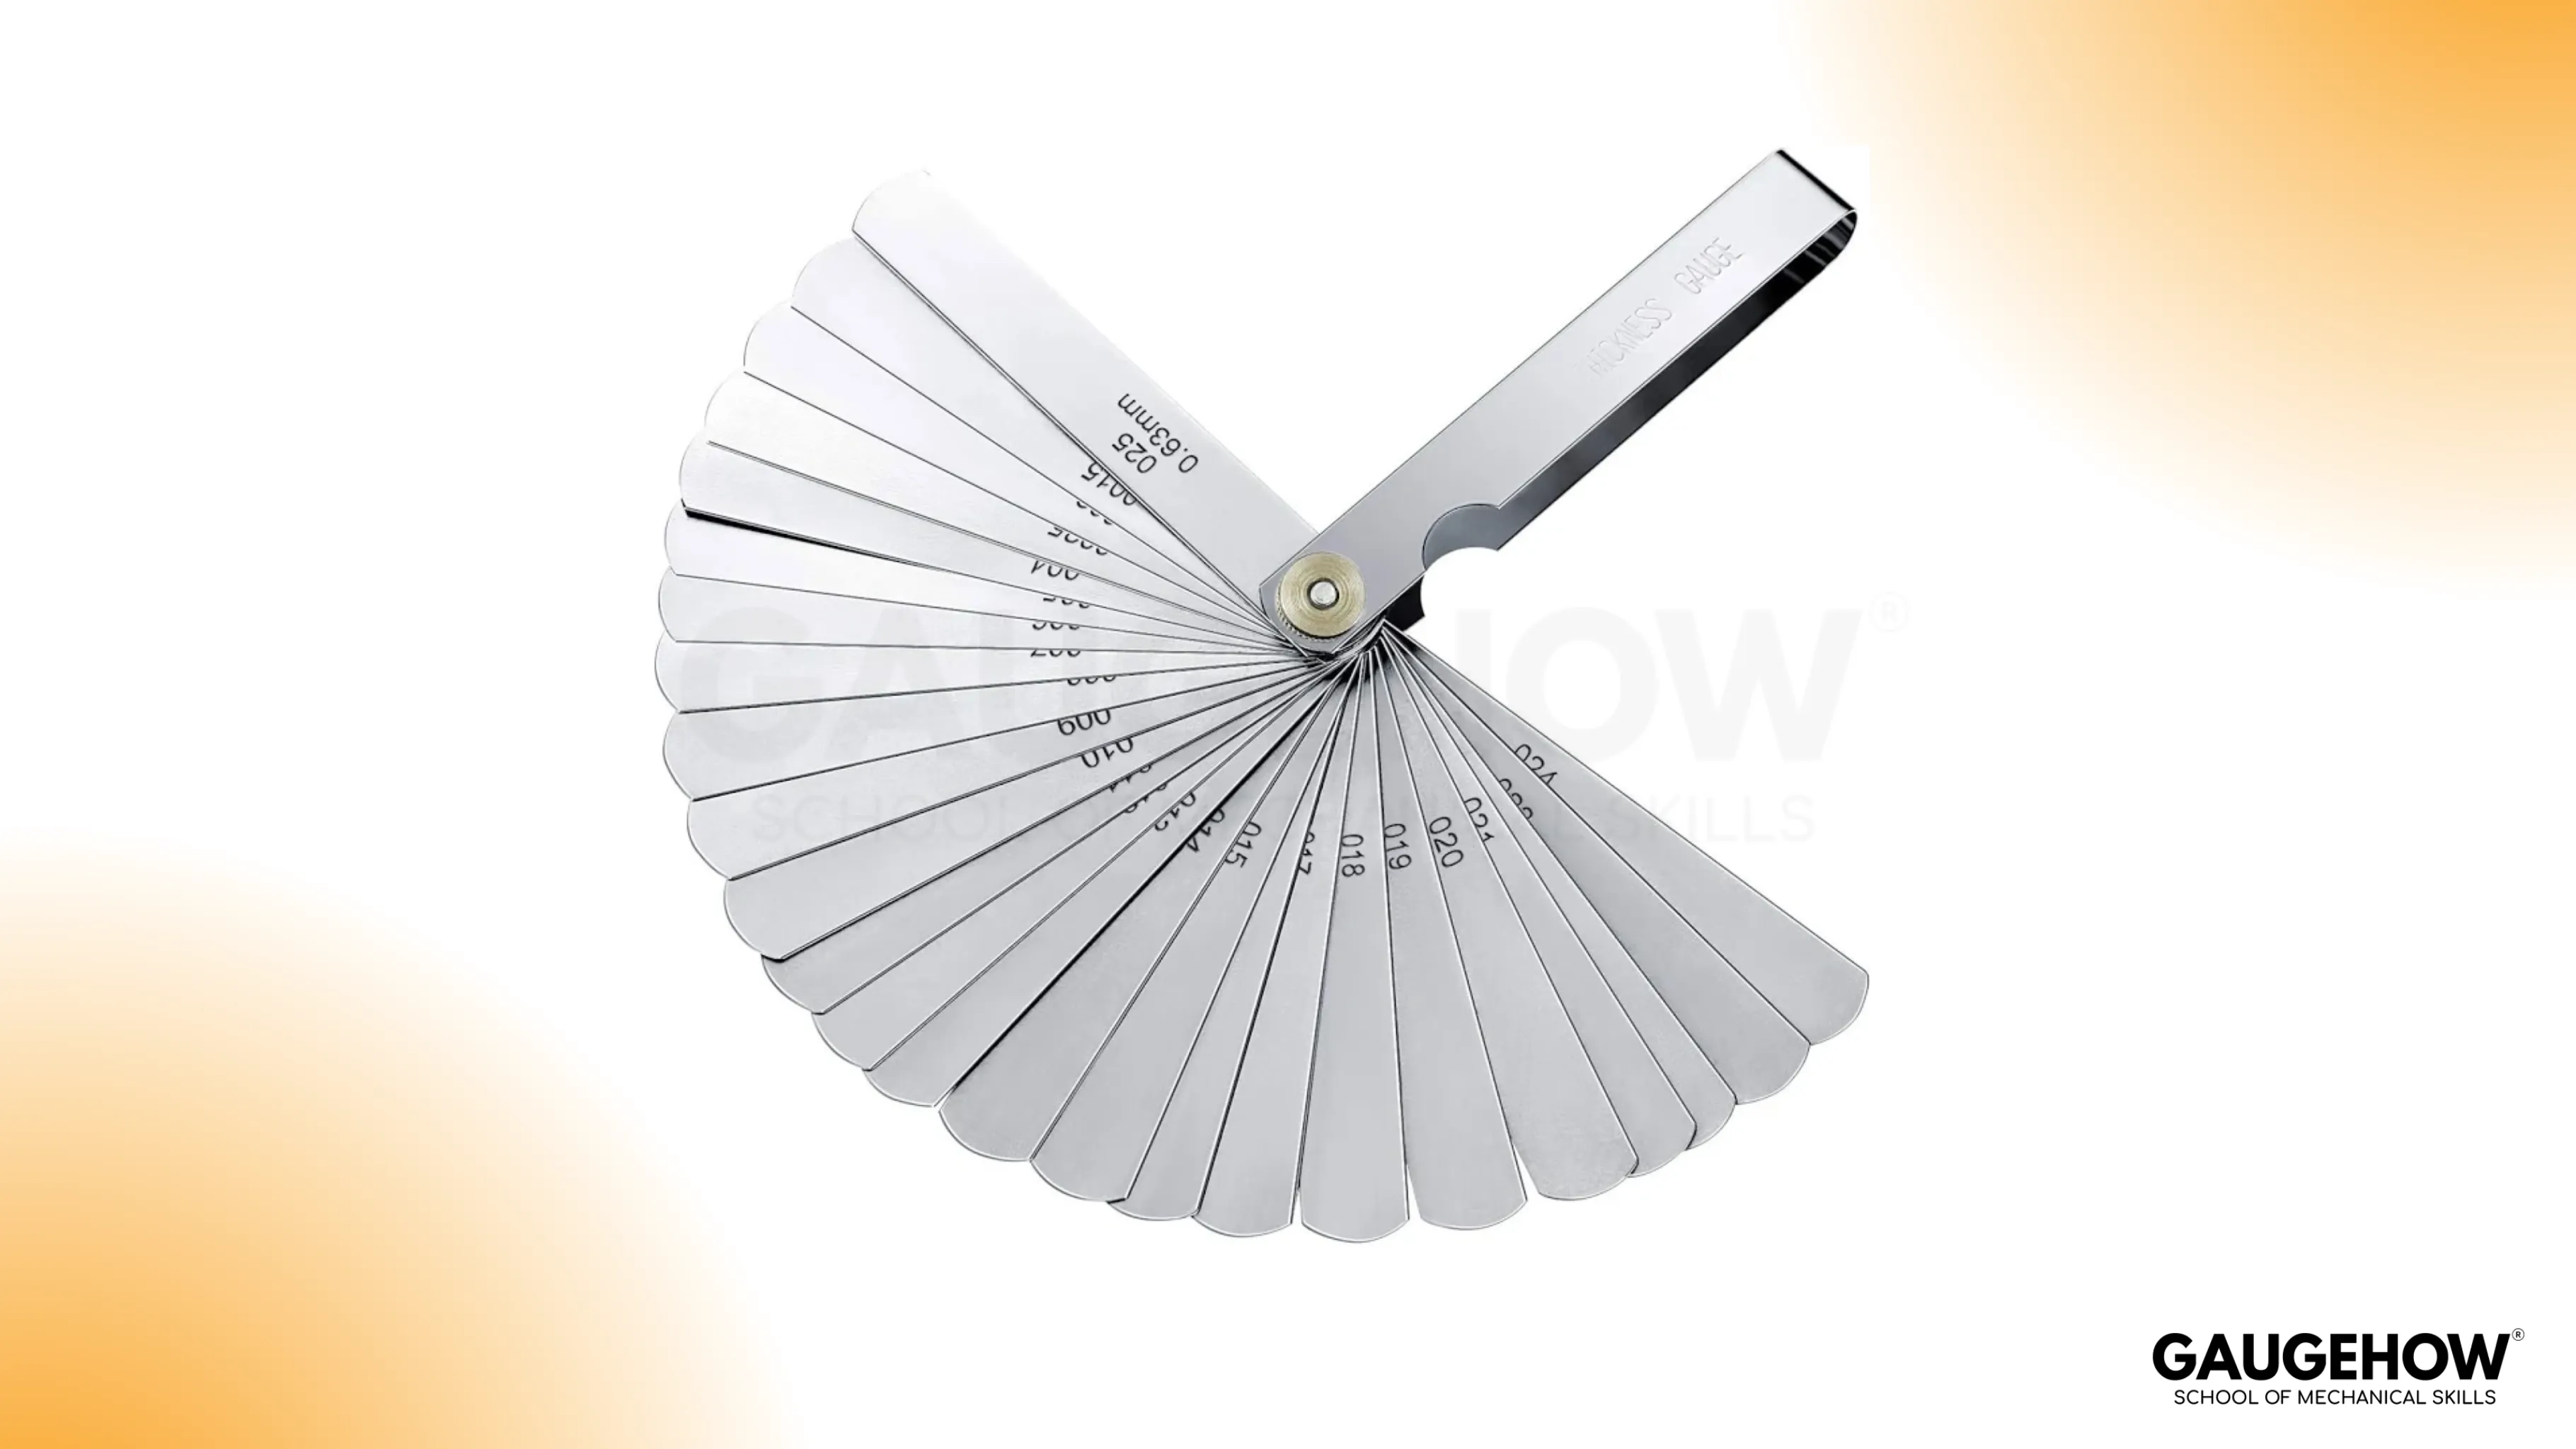
Feeler sets are clearance tools, built for gaps that affect fit, motion, noise, heat, and wear. They are deceptively simple, which is why they can be misused when surface finish, oil film, or blade condition changes the feel.
A clean approach is to treat the feel as controlled friction, not as force. Bent leaves and sloppy stacking create false confidence. A strong habit is to keep the leaves clean, verify markings periodically, and confirm tight clearances by repeating the check rather than trusting one insertion feel.
Radius Gauge

Radius gages are profile matching checks for fillets and corner radii. They help confirm whether the manufactured radius aligns with the intended geometry, which is critical for stress concentration control, assembly fit, and consistent finishing.
Partial contact is the trap. A burr or a poor viewing angle can make the fit appear acceptable when it is not. A useful habit is to clean the edge, use consistent lighting, and rock the leaf gently to detect gaps instead of pressing for contact.
Screw Pitch Gauge
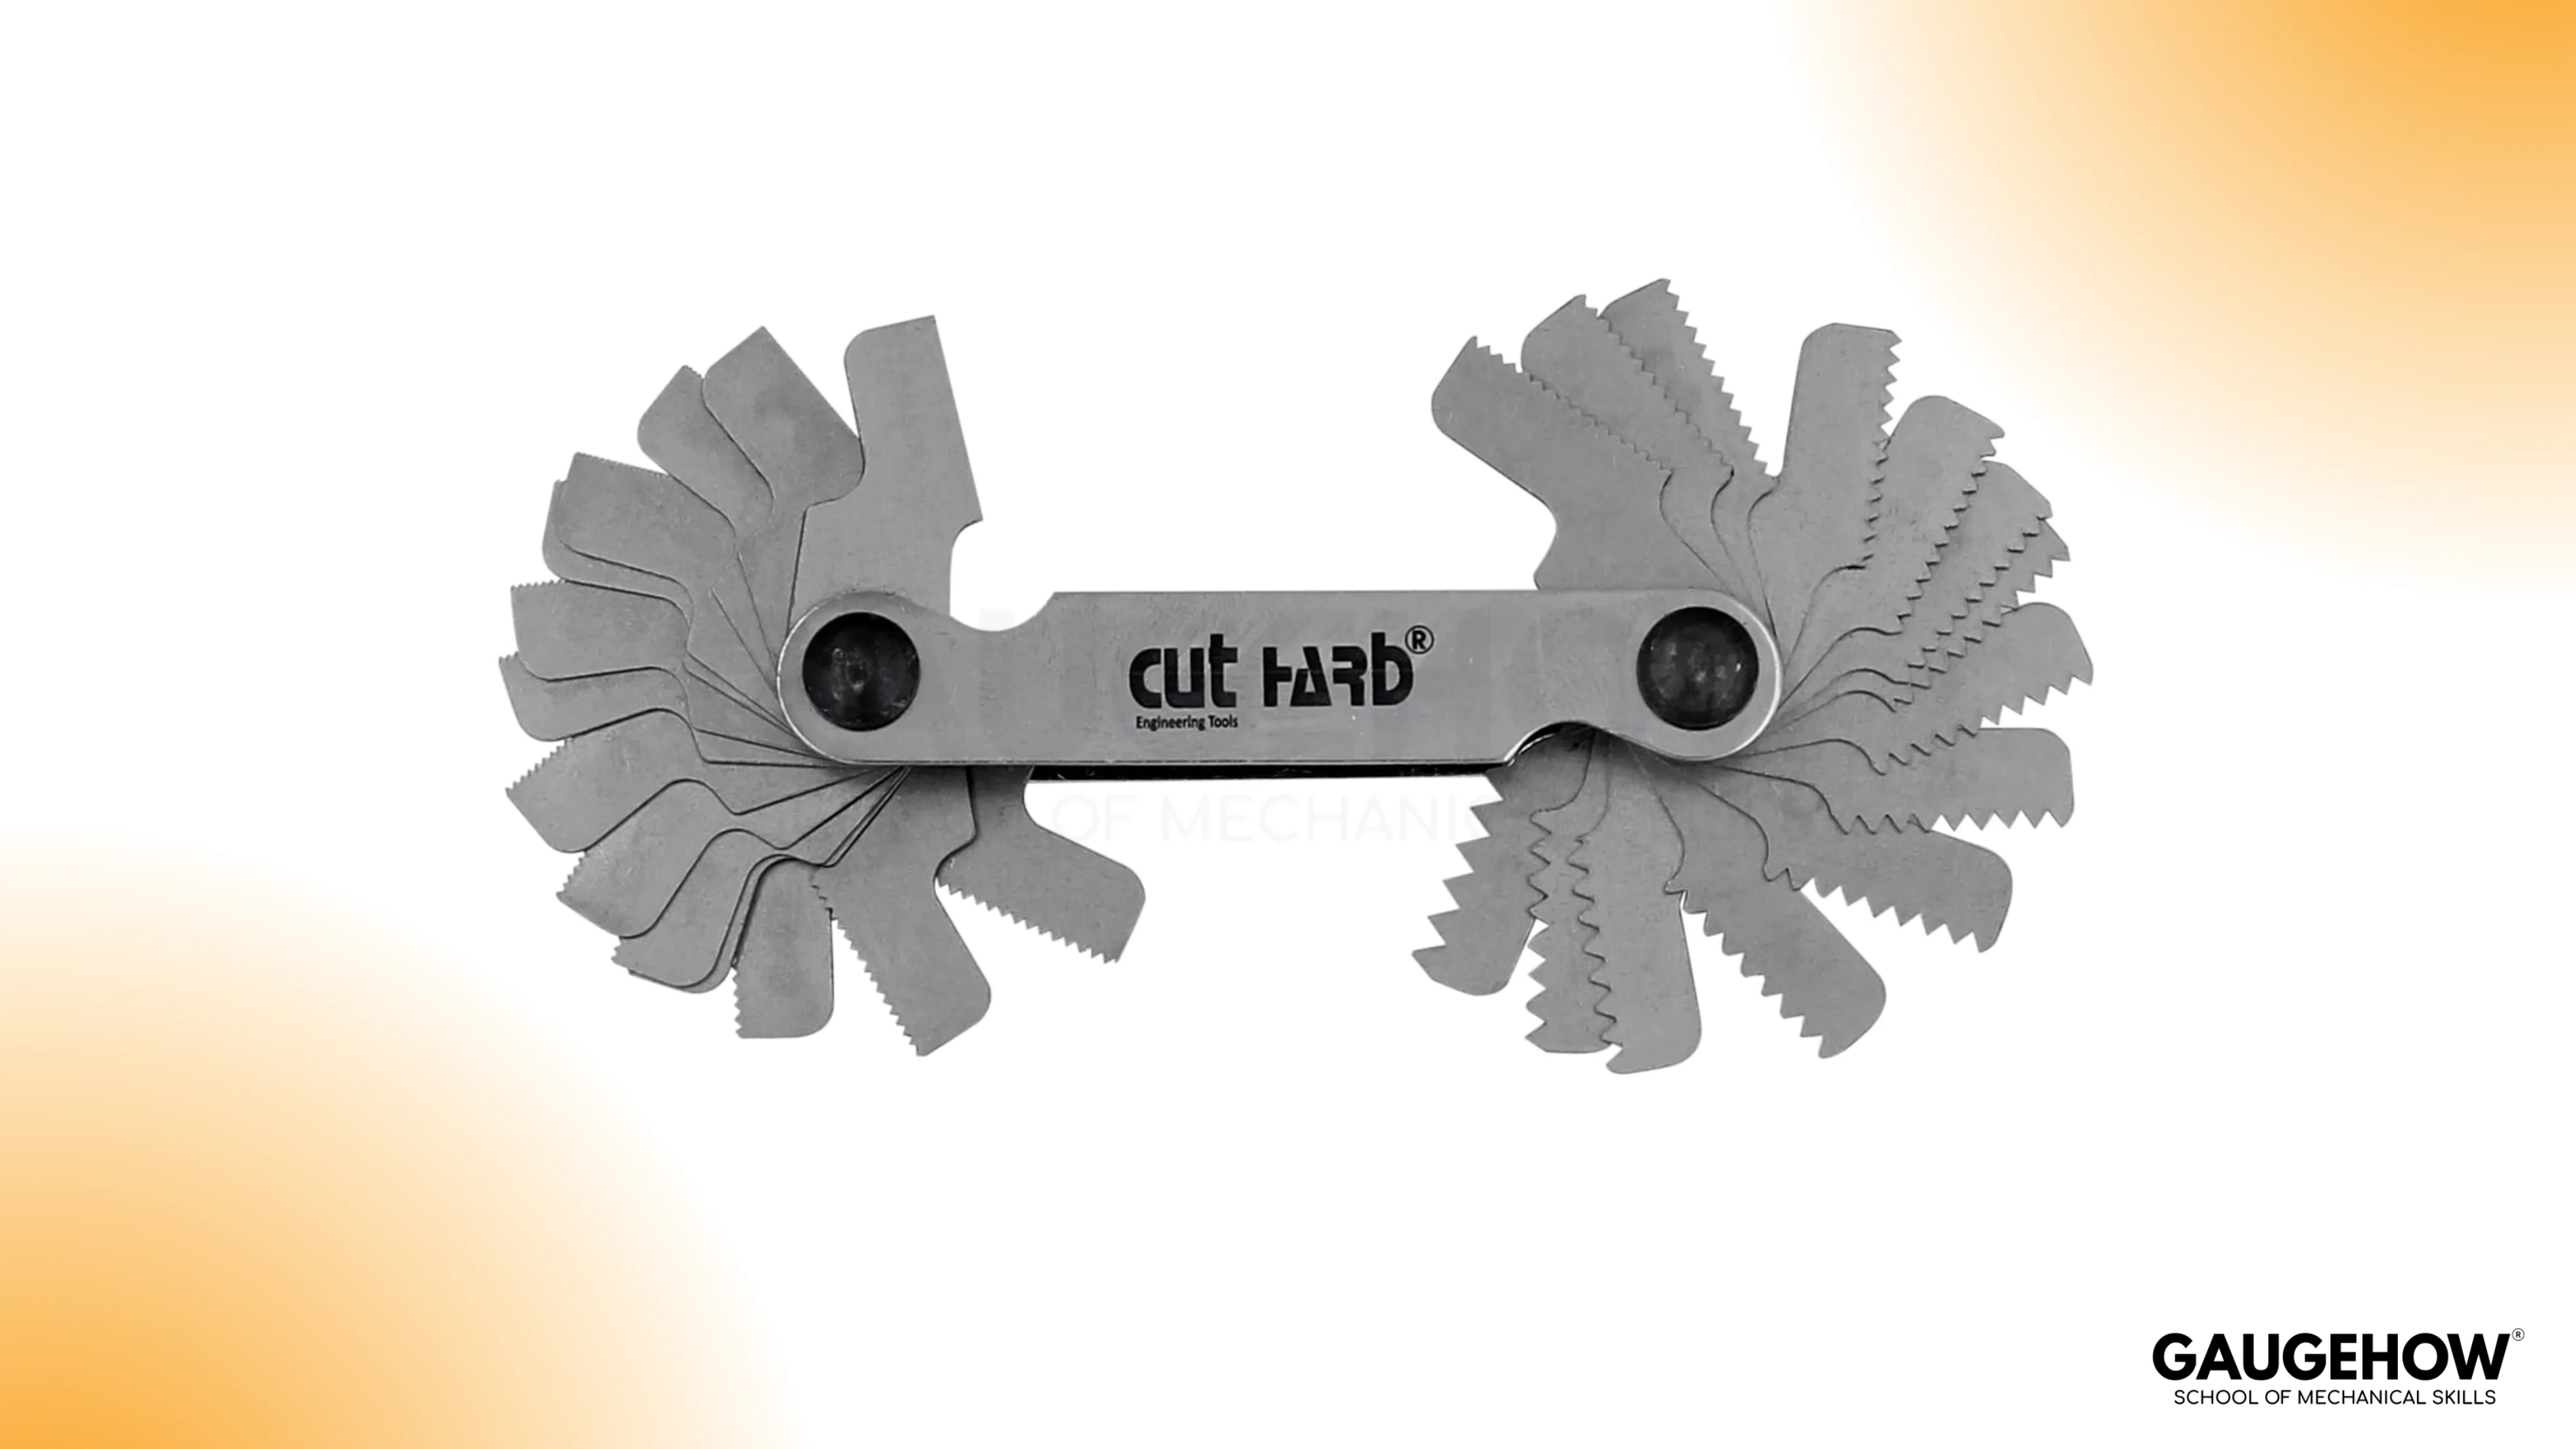
Pitch leaf sets are quick thread pitch identifiers during setup and troubleshooting. They confirm the pitch form without complex setup, and they are ideal for preventing “wrong pitch” scrap early in a job.
False matches come from partial engagement and wrong standards. If the leaf does not seat fully into the thread form, the “match” is meaningless. A reliable habit is to seat the leaf across multiple thread starts and confirm the standard before committing to a tooling or inspection decision.
Dial Gauge
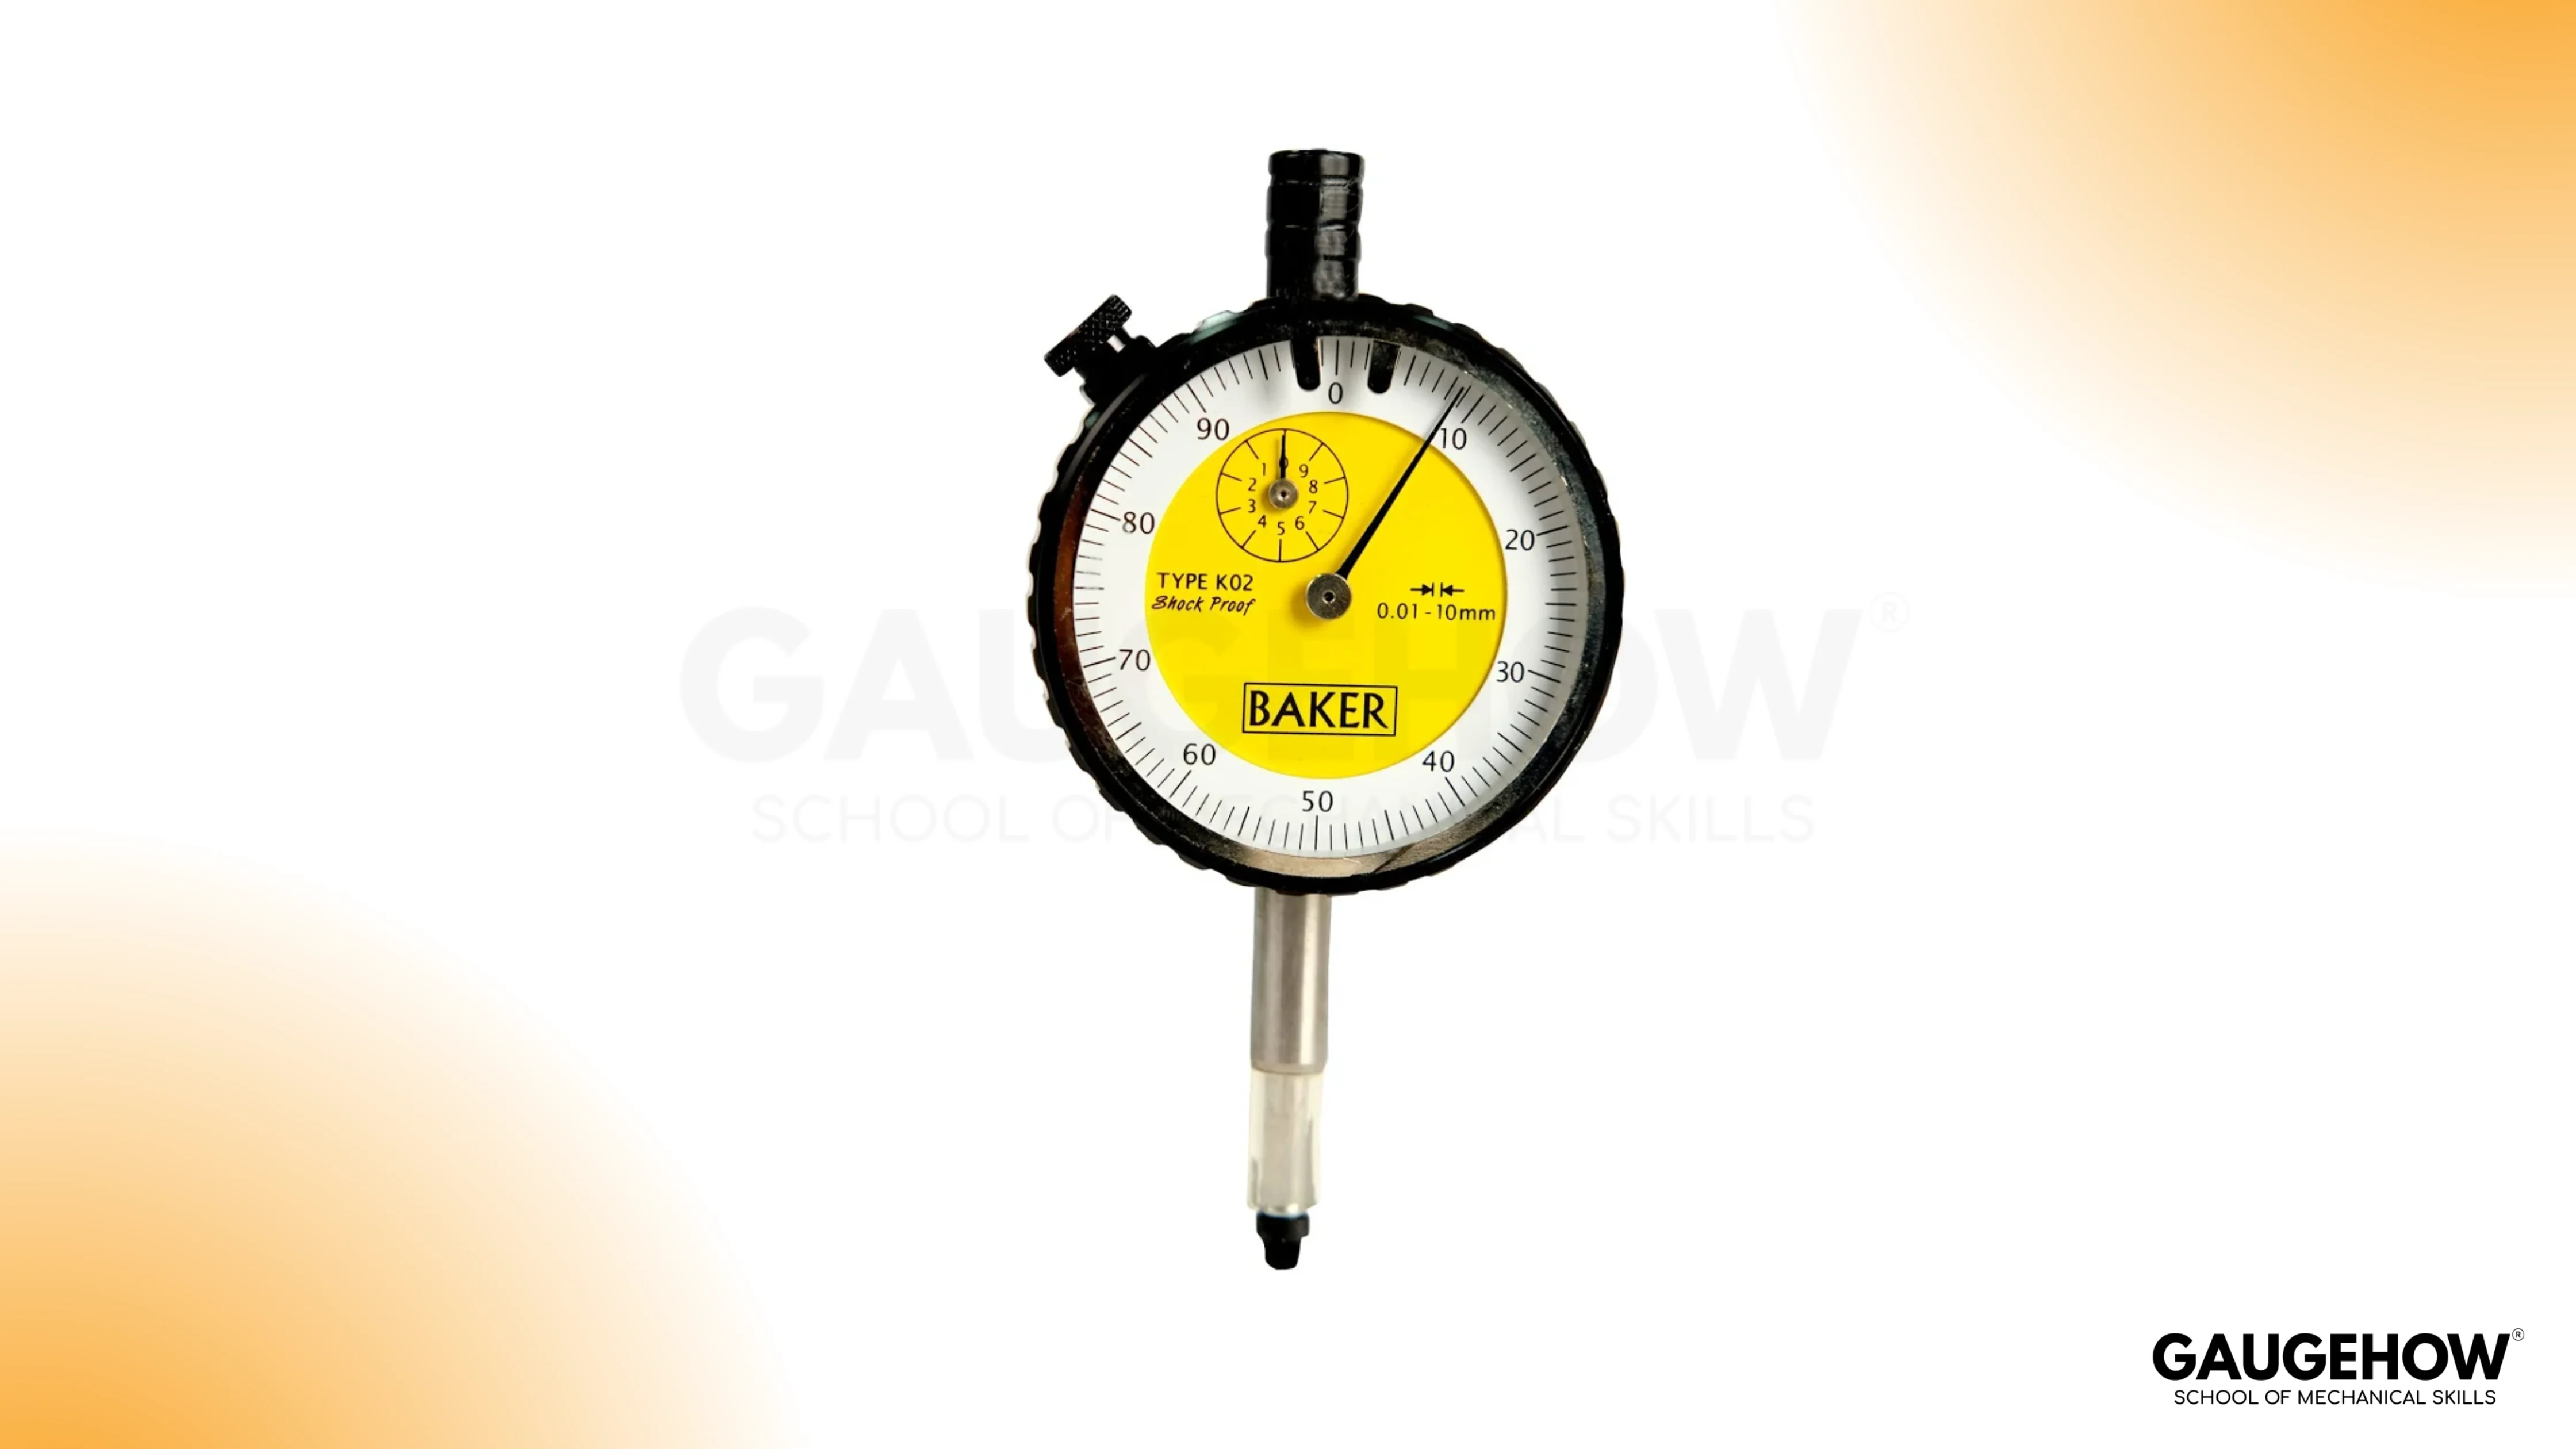
A dial indicator is a variation detector. It is the right tool when the risk is not absolute size but change, such as runout, alignment error, flatness deviation, or movement under load during setup.
Fixture stability controls truth. If the mount flexes, the indicator reports fixture behavior, not part behavior. A strong habit is to lock down the setup, keep the contact angle sensible, and re-zero after any adjustment before chasing a pattern in the needle.
Feeler vs Thread Gauge
The confusion behind feeler vs thread gauge disappears when the inspection intent is stated clearly. Clearance checks confirm a gap between two surfaces, while pitch checks identify or verify the repeating geometry of a thread form that governs fastener compatibility.
If the functional risk is interference, heat, noise, or binding, clearance belongs in the inspection plan. If the functional risk is a mismatch in the thread standard or pitch, pitch identification belongs in the inspection plan. Mixing the two produces confident results that do not protect assembly fit.
Limit gauges (Go/No-Go): Pass/Fail Without Drift
Engineered acceptance depends on controlled limits, and limit gauges (Go/No-Go) exist to make that control repeatable at speed. They answer the only production question that matters at the line: is the feature inside the permitted band, under a consistent technique, without interpretive judgment.
Long-term reliability hinges on gauge verification and wear, because contact surfaces polish, edges round, and handling introduces damage. When acceptance starts to “creep,” treat the gauge as a controlled asset, inspect its condition, and verify it against known references before blaming the process.
FAQs
1) Are gauges in metrology only for pass/fail inspection?
Gauges are often designed for pass/fail acceptance because that decision is fast and repeatable, but metrology also uses indicating tools when variation matters. Select pass/fail when the limit band is known and stable, and select indicating checks when setup, alignment, or runout control is the main risk.
2) When should a caliper be avoided for acceptance?
Avoid relying on calipers for acceptance when tolerances are tight, surface condition is inconsistent, or multiple operators must get the same answer. Use calipers to steer setup and confirm direction, then shift acceptance to a controlled method that reduces technique dependence.
3) What is the simplest rule for selecting a gauge type?
Start with the feature, decide whether you need a pass/fail call or a reading, then match speed to inspection moment and assess risk. This keeps selection grounded in function and tolerance, not in convenience or habit.
4) How do Go/No-Go checks fail in real production?
They fail when technique changes, parts are dirty or burred, or the gauge wears and gradually shifts the feel. Control comes from clean handling, consistent insertion force, and scheduled checks that catch drift before it becomes a quality escape.
5) How often should gauges be checked or calibrated?
Intervals depend on usage rate, tolerance risk, and environment. High-throughput checks and harsh shop conditions demand more frequent control. A sensible plan combines periodic calibration with in-house condition checks so gauge verification and wear issues are caught early, not after rejects pile up.


