Siemens NX: Tutorial, Student Edition & Certification (2026)

In production work, Siemens NX is a unified platform for modeling, drawings, and updates. It suits you when revisions are frequent and downstream deliverables must stay consistent.
The tutorial section builds skills through a repeatable ladder with clear outputs. Student access and certification guidance focus on operational steps and common pitfalls.
You are choosing a workflow, not a feature list. If your parts must survive edits, keep drawings aligned, and support handoff discipline, NX rewards structured learning.
If you mainly need quick concept geometry, the learning ramp may feel heavy. Use the decision table first, then follow the tutorial ladder and the revision gate.
Your need | Best fit | Fast check |
Revision-heavy parts | NX | Two-dimensional edits regenerate cleanly |
Drawing packs | NX | Views update without redimensioning |
Manufacturing handoff | NX | Orientation and units stay consistent |
Concept-only speed | Lighter CAD | If speed dominates, reduce tool depth |
What is Siemens NX
NX is a workflow system built around stable intent and controlled updates. You not only create geometry, but you create a model that remains editable. When a change request arrives, the tree, references, and constraints decide whether you revise or rebuild. That is why setup quality matters more than early speed.
In practical terms, NX becomes valuable when your deliverables must stay linked. A part drives a drawing, the drawing survives a revision, and downstream consumers trust the update. If you build with loose sketches or fragile references, that chain breaks quickly.
Where NX Is Used
NX is used where engineering output must remain consistent over time. It fits teams that publish drawing sheets, manage assemblies, and handle late design changes. It also fits environments where review clarity and handoff discipline matter.
The common thread is revision pressure. When thickness changes, hole locations shift, or interfaces move, a stable model updates predictably. A fragile model forces cleanup, rework, and rechecking, which is expensive and slow.
Siemens NX tutorial
For a first project, the Siemens NX tutorial below follows the safest learning order. File setup comes first, then screen reading, then sketch control, then solid features. That order protects you from messy edits later and unstable geometry during dimension changes.
Learning ladder
Use this ladder so progress stays measurable and reviewable.
Stage | Output | Acceptance check |
Week 1 | One part + one drawing sheet | Drawing updates after two-dimensional edits |
Week 2 | Small assembly + simple BOM | Assembly rebuilds without broken links |
Week 4 | Change request test | Revision updates do not break features or views |
Step 1: Open a new part file
Open NX, choose File > New, then select a modeling template. Set units before any geometry exists, then save the file cleanly. Correct units protect size control, and clean naming speeds revision work later.
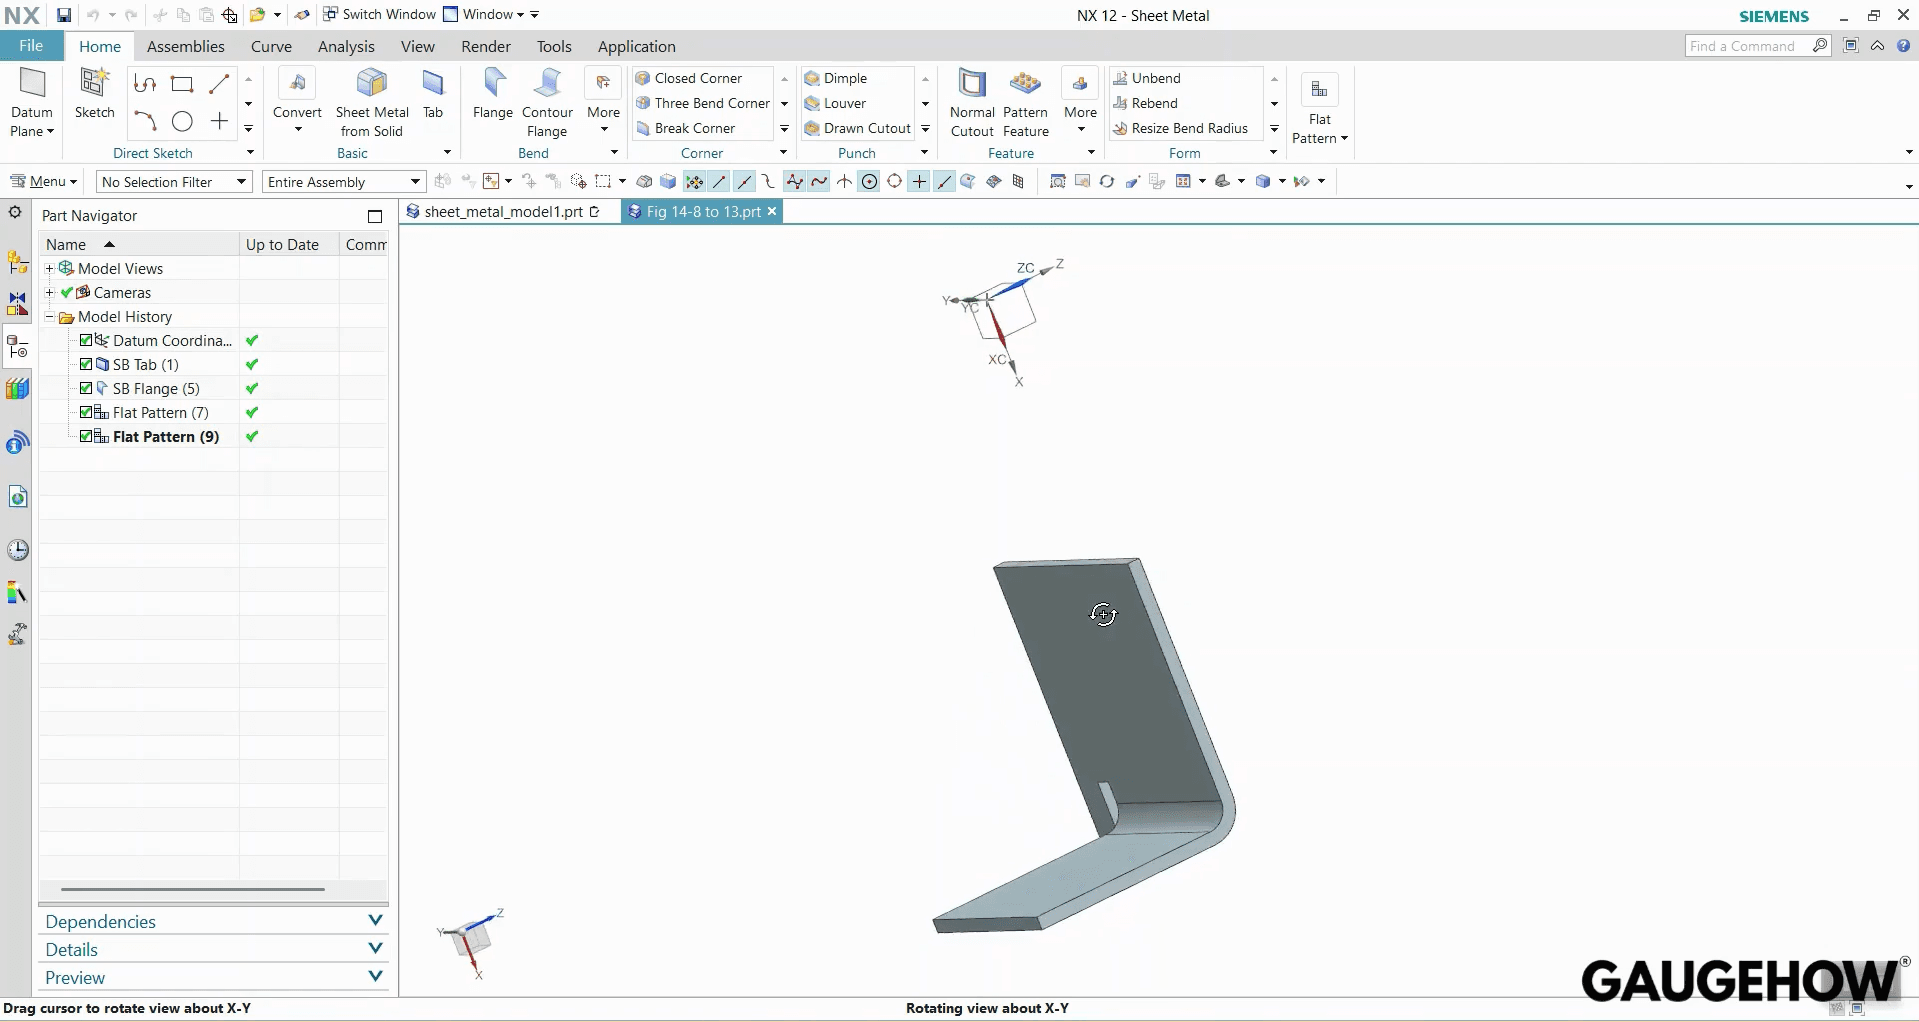
Step 2: Read the screen before you sketch
Pause after the blank part opens, and identify your working areas. Confirm your active application, then locate the primary commands you will use. Open the Part Navigator and keep it visible, because edits always come back through it.
Step 3: Start the first sketch on a stable plane
Create the base shape with Sketch, then choose a plane deliberately. The plane becomes part of your intent, not just a convenience. Keep the first sketch simple, because later features will depend on it.
Step 4: Use sketch status to lock the profile
After drawing your curves, check the constraint and definition status immediately. Use constraints to control relationships, then dimensions to control size. Your goal is predictability during edits, not a visually closed shape.
Step 5: Use Sketch Navigator as your control panel
Open the sketch management view and inspect what is still free to move. If geometry can drift, it will drift during a revision. Treat a fully defined sketch in NX as the minimum standard for stability.
Step 6: Clean the sketch with trim and closure checks
Use Trim to remove extra segments and close the profile cleanly. Confirm the profile is valid for solid creation, with no overlapping edges. Bad edges become bad solids, which become bad revisions later.
Step 7: Extrude the profile into the first body
Create the first solid using Extrude and a controlled distance value. Pick the direction intentionally, then confirm the result matches your intended part. Extrusion depth is real thickness, so treat it as a design driver.
Step 8: Sketch again on an existing face
Start the next sketch directly on a face of the solid body. Face-referenced sketches stay grounded in the model’s real context. Floating references feel easier early, but they become unstable during changes.
Step 9: Build connected outlines efficiently with profile tools
When you need a continuous outline, use a connected curve approach. The goal is fewer broken chains and fewer independent segments. A cleaner sketch structure makes constraints easier to read and easier to repair.
Step 10: Add chamfers where they serve intent
Apply Chamfer only after the base form is stable. Use it to represent manufacturable edge transitions or assembly clearance needs. Chamfers added too early can become fragile parents during later edits.
Step 11: Place the first hole as a master feature
Create one correct hole first, then build the rest from it. Use a hole and place it with controlled references and dimensions. A single master hole is easier to validate than four manually placed holes.
Step 12: Pattern the hole instead of repeating work
Use Pattern Feature to replicate the master hole with controlled spacing. Patterning centralizes edits, so changes do not require rework everywhere. It also reduces spacing drift and manual placement errors.
Step 13: Mirror the pattern across a defined plane
Mirror the hole set when symmetry is intended. Define a mirror plane using an existing plane or a constructed offset plane. Mirroring preserves symmetry and keeps both sides linked during revisions.
Step 14: Add edge blends at the end
Use Edge Blend once the geometry is stable and verified. Blends are sensitive to upstream changes, especially near intersections. Keeping them late reduces rebuild failures and keeps edits predictable.
Step 15: Refine model display for review and clarity
Use display controls to improve readability without changing geometry. Adjust visibility, color, or transparency when reviews require clarity. Cleaner presentation reduces review errors and speeds design discussions.
Step 16: Assign visual materials when downstream work needs them
Assign a visual material when you want a consistent appearance or future analysis alignment. Material intent helps when the model moves into simulation or validation workflows. If you are only learning, treat it as an optional finishing discipline.
Revision Survival Gate
Run this before you send files or publish drawings.
Confirm part and drawing units match
Confirm sketch definition status is fully controlled
Confirm feature order keeps core shapes before blends
Update the drawing after an edit and recheck dimensions
Confirm exports keep orientation, units, and naming consistent
Siemens NX student edition
For learning access, Siemens NX student edition works best when you treat it like a controlled setup. Use the official student portal flow, complete verification steps, and avoid unofficial installers. Most beginner time-loss comes from partial downloads, messy extraction paths, and version mismatch with tutorials.
Operational setup steps
Start with a clean sequence, then validate with a simple test part.
Sign in and verify your student account before downloading.
Download the installer package completely, without interruptions.
Extract to a short local folder path, then run the installer.
Complete first launch prompts, then open a test part.
Build one sketch, one extrude, then save and reopen.
What usually goes wrong, and how you recover
Install failures typically trace back to incomplete downloads or bad extraction. Re-download fully, extract cleanly, and run installation as a single controlled attempt. UI mismatch usually comes from release differences, so follow workflow logic rather than button position.
Some limitations matter when you plan downstream use and sharing. Treat NX student edition limitations as an operational constraint, not a surprise later. Use student access for learning and portfolio deliverables, then transition to commercial environments when required.
Siemens NX certification
Certification makes sense when your workflow outputs are already stable under edits. With Siemens NX certification, the practical value comes from proving repeatability. Hiring managers and leads trust outputs that survive revision updates, not memorized command lists.
Choose the track based on your deliverables
Pick a design-focused track if you publish models and drawings.
Pick a manufacturing-focused path if you build toolpaths and setups.
Track choice should match the work you expect to deliver weekly.
Prepare with the same ladder you use at work.
Use a repeatable pack for preparation: one part, one drawing, one revision update. Add an assembly and BOM once the first pack stays stable. When the Week 4 change request test passes cleanly, certification timing becomes practical.
Exam readiness, in plain terms
Readiness is not about coverage; it is about control. You should be able to locate parent features quickly and correct references without rebuilding the model. If edits still break your tree, repeat the ladder until stability becomes routine.
Many people book the exam before the workflow becomes automatic. That usually leads to rushed studying and inconsistent results. Schedule the attempt after your revision gate passes reliably, because that is what the exam environment indirectly demands.
Siemens NX vs Fusion 360
Features | NX (Siemens) | Fusion 360 |
Revision stability | Strong for frequent, late engineering changes | Strong when projects stay simple and controlled |
Drawing packs | Designed for drawing continuity through updates | Good, often simpler for lighter documentation needs |
Manufacturing handoff | Strong where setup discipline and outputs must match | Effective for many shops, faster entry for many users |
Learning curve | Steeper, with long-term workflow payoff | Faster early momentum, simpler starting experience |
Team environment | Common in structured, process-heavy teams | Common in small teams and mixed project contexts |
Change resilience | Excellent when intent is modeled and managed | Good, but depends more on the project structure |
If revision survival and handoff control drive your workload, choose NX. If speed, accessibility, and fast iteration dominate, Fusion often fits better.
Pricing
Budgeting works best when you separate learning access, certification costs, and commercial licensing. Student access is the lowest-friction route for structured learning. Certification attempts are paid, so timing matters, and readiness should be proven first. Commercial licensing is typically quote-based because module scope and support expectations vary.
When cost decisions get messy, return to deliverables. Define what you must publish, define who consumes it, and define change frequency. That framing turns pricing into a scoped engineering decision, rather than a guessing exercise.
FAQ
Is NX hard to learn for mechanical design work?
NX is manageable when you learn workflow discipline first. Focus on units, screen navigation, sketch control, and feature order. When a part survives two-dimensional edits cleanly, learning becomes predictable, and confidence improves quickly.
How do I avoid models breaking after a change request?
Model breakage usually comes from weak sketches and fragile parent references. Use controlled constraints, confirm sketch status, and keep blends late. A revision gate check after edits prevents surprises and reduces rebuild loops significantly.
What is the best PC setup for smooth NX learning?
Prioritize stable CPU performance, sufficient RAM, and a workstation-class GPU if available. Storage speed also matters for large assemblies. Consistent drivers and a clean install reduce crashes more than chasing peak benchmark numbers.
Can I use the student version for professional work?
Use student access for learning, portfolio outputs, and controlled practice packs. Professional release workflows often require tighter licensing, sharing, and compliance expectations. Keep student work clean and transferable, then transition when deliverables become commercial.
How useful is certification for hiring and career growth?
Certification helps when it matches the job’s toolchain and deliverables. It works best alongside a portfolio pack showing stable models, drawing updates, and revision control. Consistent output under edits is the strongest hiring signal.
CAD-CAM-CAE Work Platform
Find or Post CAD, CAM and CAE freelance projects, full-time jobs and Internships.
GaugeHow is the platform built for core engineering work. Whether you need a freelancer for a CAD project, a full-time hire, or an engineering intern,post it here and get matched with the right person.


