How to Learn CAM: A Practical Roadmap From Beginner to Job-Ready
Learn More in This Video
Subscribe to GaugeHow for More
How to learn CAM starts with one clear goal. You need to move from part geometry to setup, toolpaths, simulation, post output, proof, and release. Real progress comes from reviewed practice, clean files, stable workflow, and proof that another person can understand.
What CAM Actually Controls
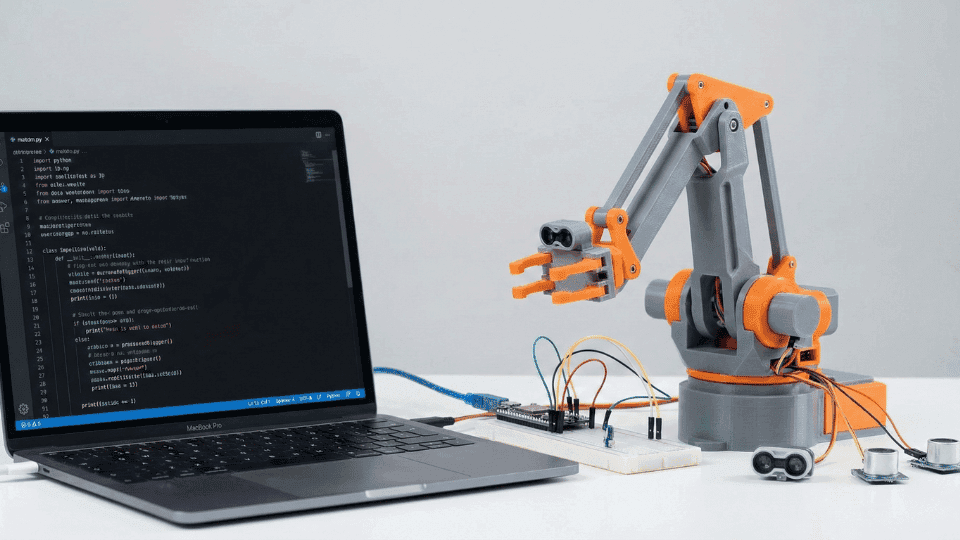
CAM is the process layer between design and machining. It takes part geometry, stock definition, setup logic, tool selection, cutting settings, and machine intent. Then it decides how material gets removed, in what order, with which tools, under which movements, and under what review conditions.
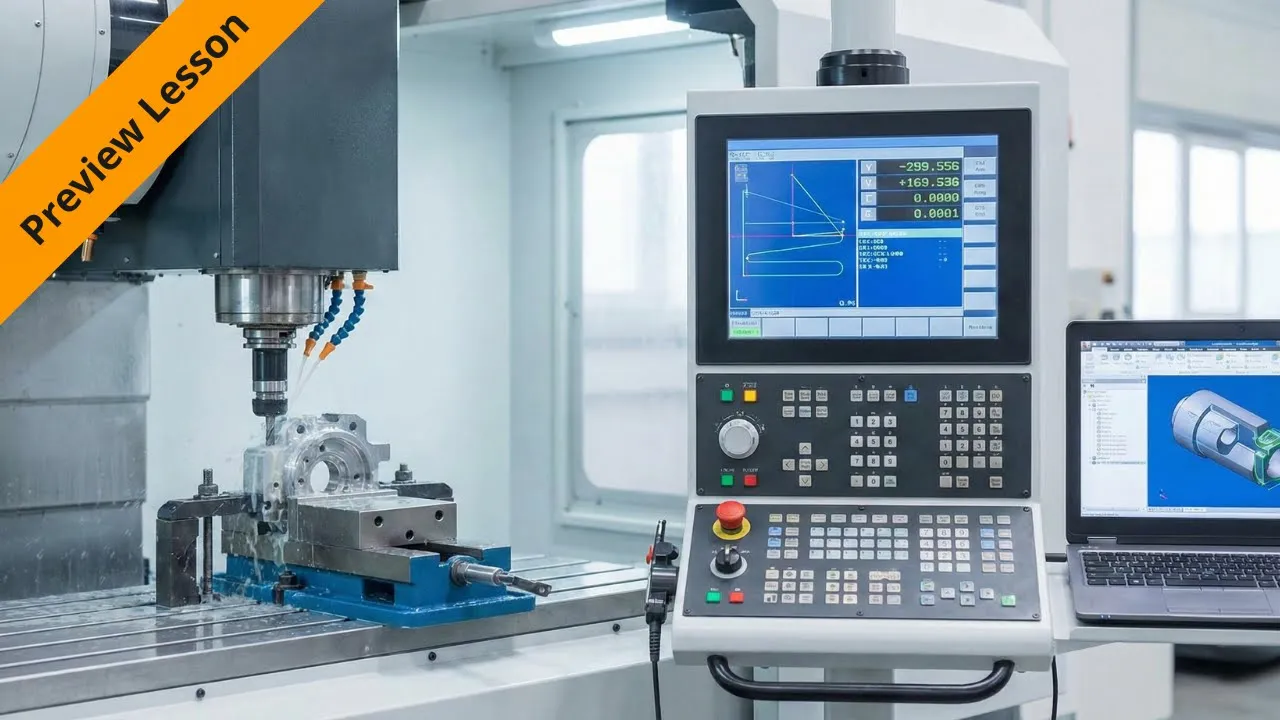
Output from CAM is not only the posted code. Good output includes toolpaths, simulation, setup notes, tool lists, revision control, and handoff records. A CNC machine uses posted output to run the part. Before release, someone still needs to review motion, offsets, tool access, holder clearance, and file accuracy.
That scope needs to stay clear from the start. CAD defines shape. CAM defines process. CNC machines execute. Inspection checks the result. Once those boundaries make sense, learning stops feeling random and starts looking like a workflow.
Which Skills Come First
Early CAM learning should begin before software speed becomes the focus. Better progress comes from understanding what a part needs, how stock will sit, where origin should go, and which tool can reach each feature without creating bad setup decisions.
The first step is learning to read geometry with manufacturing intent. A pocket is not only a shape. It carries depth, access limits, floor finish needs, and entry choices. A hole pattern is not only about placement. It affects tool order, setup stability, drilling logic, and review time.
Before you move to harder parts, build comfort with these basics:
● drawing interpretation
● stock and origin planning
● basic cutters and uses
● feeds and spindle logic
● setup thinking
● simulation review
● file naming and revision habits
Good practice means each basic skill should connect to one output. Geometry review improves setup. A better setup improves toolpaths. Better toolpaths improve simulation. Better simulation improves release confidence.
CAM for Beginners
CAM for beginners should start with simple parts and a complete review, not complex geometry and scattered tutorials. Flat plates, drilled features, open pockets, and basic profiles teach more than flashy parts because they expose setup logic, cutter choice, entry moves, and sequence control clearly.
A better way to learn is to keep one project small enough to finish fully. Build stock, choose origin, pick tools, generate operations, run simulation, save posted files, and review the full handoff. That cycle teaches process ownership. Random command practice usually does not.
One common mistake is chasing harder software features too early. Multi-axis curiosity is normal, but weak basics make later work slower. Real progress comes from repeating core operations until setup, simulation, and review feel stable.
How Workflow Moves
A real learning path should follow the manufacturing handoff, not a list of disconnected topics. First comes the part review. Next comes stock definition, workholding logic, and origin choice. Then, tool selection, operation order, simulation, post output, proof, and release.
That sequence shows where CAM earns its value. Geometry does not become machine output by itself. Someone has to define setup logic, choose safe paths, track settings, and validate results before release. Strong learners understand that every stage changes the next stage.
Once you can see the handoff clearly, practice gets sharper. Instead of asking which button comes next, you start asking better questions. Which feature should get cut first? Which tool gives cleaner access? Which retract keeps holder clearance safer? Which review point protects release quality?
CAD to CAM Workflow
A clean CAD to CAM workflow starts when the finished geometry is ready for manufacturing review. At that point, sketches, modeling, or imported design data become a process plan. Stock size gets defined. Origin gets chosen. Tool access gets checked. Operations get ordered for stable material removal.
After that, the CAD to CAM workflow moves into simulation, post output, and handoff records. That shift is where many beginners lose control because the part still looks correct,, while the process stays weak. Good learning means reviewing both the shape and the manufacturing path before anything looks complete.
Which CAM Software Should You Learn First
CAM software should be chosen based on the learning stage, workflow needs, machine goals, and review depth. One platform is enough at the beginning if it lets you define stock, create basic operations, simulate motion, and post output without too much friction.
Fusion 360 is often the easiest first path for one-platform learning. It covers modeling, toolpaths, simulation, and post-work inside one environment. That makes practice cleaner when you still need to understand the full flow.
Mastercam becomes useful when shop adoption, stronger production exposure, and machine-focused workflow matter more. CAD-linked options help when design work already happens inside a connected environment. Light tools can help narrow early learning, but they rarely build a full release habit well.
A good selection should follow one question first. Which platform helps you complete the full cycle with the least confusion? That answer usually leads to stronger review habits than choosing only by brand name.
How to Learn CAM
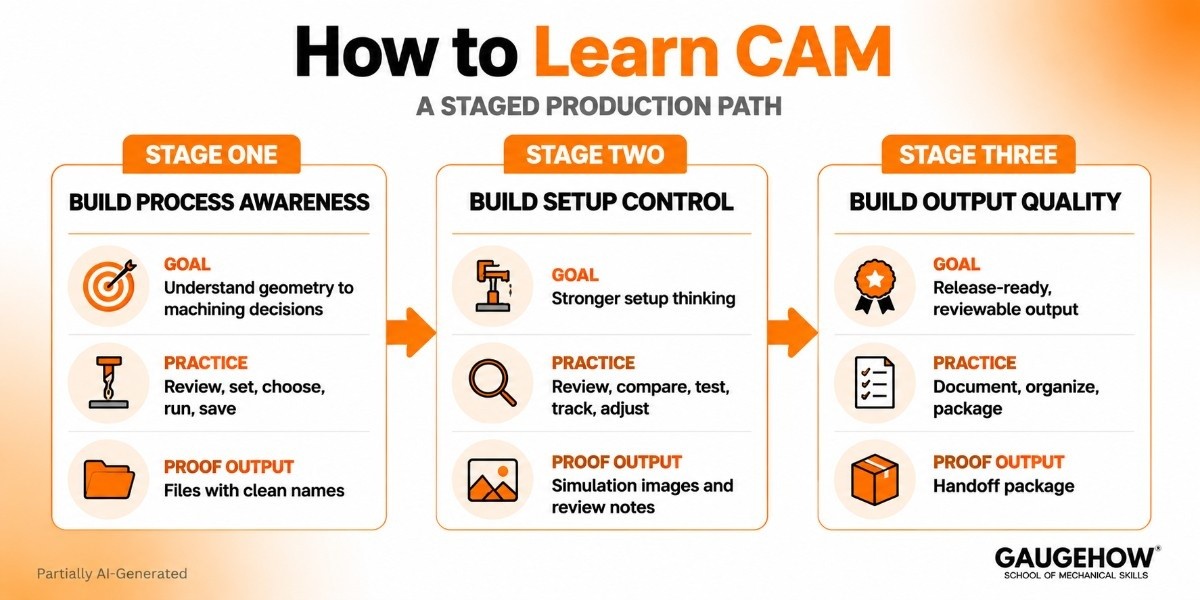
The roadmap should feel like a staged production path. Each stage needs one clear goal, one clear type of practice, and one clear proof output.
Stage One: Build Process Awareness
Start by learning how part geometry turns into machining decisions. Review flat parts, simple pockets, hole patterns, and outside profiles. Define stock. Set origin. Choose basic cutters. Run short operations. Save every file with clean names.
At this stage, the goal is not speed. The goal is control. Once the origin choice, cutter purpose, and operation order make sense, later software work gets much easier.
Stage Two: Build Setup Control
Now move into a stronger setup thinking. Review clamp positions. Assess holder space. Compare tool access. Test different entries. Track feeds and spindle settings with intent instead of copying defaults. Save simulation images and short review notes for each project.
This stage is where weak habits start showing. Rushed setup logic creates poor access. Poor access creates bad toolpaths. Bad toolpaths create messy proof. Cleaner setup decisions improve everything that follows.
Stage Three: Build Output Quality
At this stage, focus on output that another person could review. That means posted files, setup notes, tool lists, revision names, screenshots, and a clear handoff package. One finished project with clean records is worth far more than many half-finished exercises.
Once you can explain how a part moved from geometry to release-ready files, your learning is no longer abstract. It starts looking like real production work.
Which Skills Should You Learn Before Toolpaths
Toolpaths only make sense when the upstream thinking is stable. Before you move to harder strategies, you should be able to assess geometry, define setup logic, choose basic tools, and align settings with material and feature type.
That is why skills should be framed as ownership, not definitions. Review discipline keeps revision history clean. Handoff clarity reduces operator confusion. Change tracking protects repeat jobs. Approval readiness speeds release because fewer questions remain open. Stronger skill framing creates stronger job-facing content because it sounds like work, not a classroom list.
CAM Programming
CAM programming should be understood as controlled output creation, not software clicking. The work includes choosing operation order, assigning tools, setting cutting values, generating motions, checking simulation, posting output, and preparing records that support approval or release.
At the entry level, CAM programming usually means facing, drilling, contouring, pocketing, chamfering, and simple finishing work. Later stages add better entry strategy, smarter roughing logic, cleaner tool order, tighter revision control, and stronger handoff quality. Output grows stronger because the review grows stronger.
Toolpath Generation
Toolpath generation should begin only after the setup logic looks stable. Roughing removes bulk material. Drilling creates location and depth features. Contouring defines outside form. Finishing improves walls, floors, and final surface quality. Each path needs one clear purpose tied to the part.
Good toolpath generation depends on reasoning, not default settings. One toolpath may reduce cycle time. Another may protect the finish. Another may improve access near clamps or walls. When each path has a reason, review becomes easier, and change decisions become cleaner.
What Good Output Looks Like
Job-ready work should not stay vague. Good proof needs visible deliverables that show control, review quality, and release readiness.
A strong beginner package usually includes:
● reviewed part file
● clean setup plan
● controlled tool list
● simulated machining program
● posted machine output
● tracked revision note
● handoff-ready process record
That stack makes job-ready progress measurable. It shows more than software familiarity. It shows workflow control, documentation habits, and approval awareness.
Which Projects Build Proof
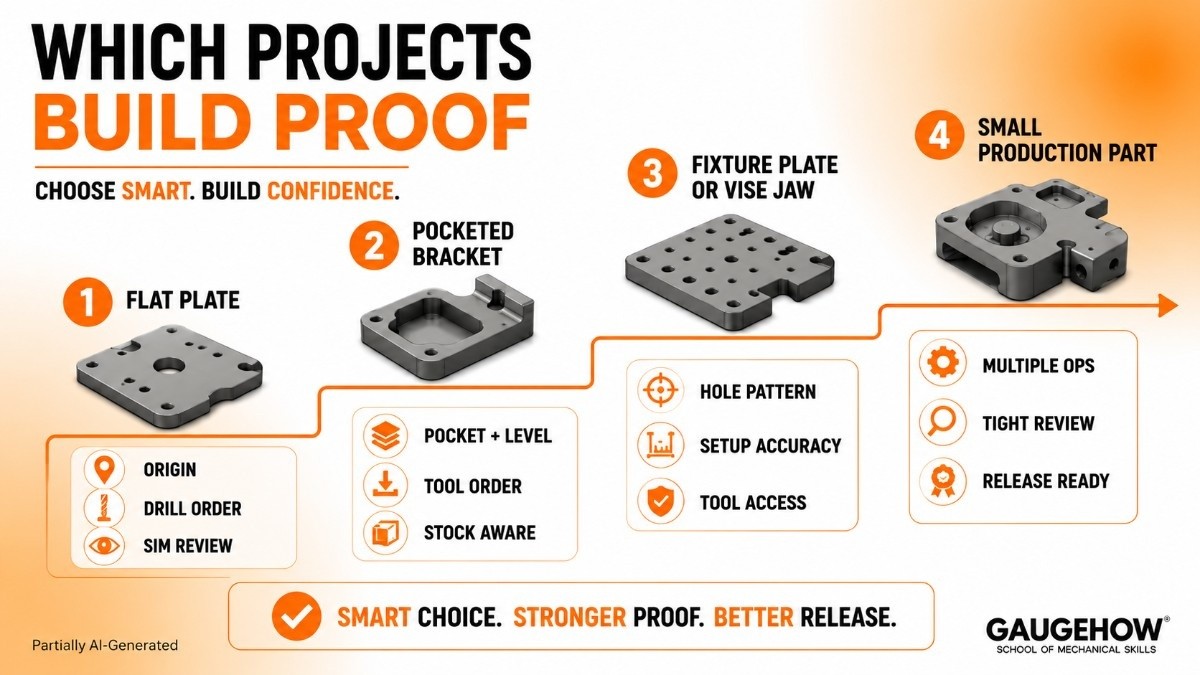
Project choice should follow a ladder, not a random list. Each project should introduce one new setup decision, one new operation challenge, and one stronger proof requirement.
Project One: Flat Plate
Use a simple plate with holes and an outer profile. This teaches origin choice, drill order, contour logic, and clean simulation review. Save the part file, simulation image, posted output, and a short setup note.
Project Two: Pocketed Bracket
Add one pocket, one level change, and a finishing pass. Now you need a better tool order, better entry choices, and cleaner stock awareness. Review where poor roughing would affect finishing later. Save revision notes with the output package.
Project Three: Fixture Plate Or Vice Jaw
This project teaches repeatability. Hole pattern discipline, setup accuracy, and tool access matter more here. Save a tool list, handoff note, and final post with controlled naming.
Project Four: Small Production Part
Finish with one part that uses multiple operations and a tighter review. Treat it like a release package, not a practice file. That is where learning starts looking employable.
What Makes A CAM File Ready For Release
This is the point most weak blogs miss. A file is not ready because the simulation looks smooth. A file is ready when the setup logic, tool intent, post choice, documentation, and review all support a clean machine handoff.
Check these points before calling anything complete:
● stock matches current part intent
● origin matches setup plan
● Fixture space is still safe
● holder clearance looks clean
● tool list matches operations
● post matches target machine
● Revision naming stays controlled
● Set up notes support handoff
● proof supports approval
Release readiness changes how you practice. It pushes learning away from button memory and toward accountable output. That is what makes the roadmap feel like engineering work.
CNC Program Proofing
CNC program proofing should happen before any release decision. Review geometry, origin, setup, tool list, clearance moves, retract logic, posted output, and revision naming in one controlled pass. That review protects machine safety, file accuracy, and handoff clarity together.
Good CNC program proofing also checks documentation, not only motion. Simulation can still look clean while the post choice stays wrong or the revision control stays weak. Proofing closes that gap and turns practice into a dependable manufacturing workflow.
Learn With GaugeHow
GaugeHow teaches CAM in order to meet real work demands. You move through geometry, setup, toolpaths, simulation, post output, proof, and release with a cleaner structure than scattered tutorials usually provide.
A better way to learn is guided progression tied to real manufacturing outputs. GaugeHow connects Engineering Drawing, GD&T, CNC Programming, and CAM workflow so practice leads to review-ready files, stronger proof projects, and better job-facing skills.
FAQs
Can CAM be learned without CNC machine access?
Yes. Early progress comes from geometry review, setup planning, simulation, and post-understanding. Machine access helps later, but stable workflow habits can be built first through complete projects and clean handoff practice.
Which software should come first for CAM learning?
Choose one platform that supports setup, simulation, post output, and project review clearly. Fusion 360 often works best early. Mastercam becomes stronger when shop workflow and production-focused practice become the main goals.
Do you need G-code before learning CAM?
Not first. Geometry, setup logic, tools, and simulation should come before deeper code study. G-code becomes easier once the posted output, machine behavior, and proof decisions already make practical sense.
What should a beginner CAM portfolio contain?
Keep complete workflow evidence, not only screenshots. Show one part file, one setup plan, one tool list, one simulated program, one posted output, one revision note, and one handoff-ready record.
How do employers judge CAM readiness?
Most leads look for stable setup logic, clear review habits, clean files, usable handoff records, and repeatable output. One complete, well-documented project often proves more than many unfinished practice exercises.
Mechanical Engineering Courses That Industry Actually Uses
Learn Tools of Design & CAD, Analysis & Simulation, Automation & Robotics, and Industry 4.0 used in modern factories.
Join 40+ Mech Courses like GD&T, Siemens NX, SolidWorks, CATIA V5, AutoCAD, ANSYS (FEA & Fluent), ABAQUS, Creo, Fusion 360, CNC Programming, Digital Twins, Python for Mechanical, and Industry 4.0.
Our Courses
Complete Course Library
Access to 40+ courses covering various fields like Design, Simulation, Quality, Manufacturing, Robotics, and more.